
How to Move Files to Bluestacks from PC: A Detailed Guide for Bluestacks X
Are you looking to transfer files from your PC to Bluestacks X? Whether you want to install apps, share documents, or simply manage your files more efficiently, this guide will walk you through the process step by step. Bluestacks X, the latest version of the popular Android emulator, offers a seamless experience for PC users. Let’s dive in and explore the various methods to move files to Bluestacks X from your PC.
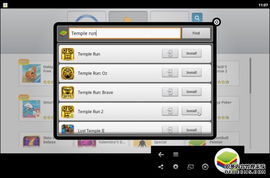
Using the Bluestacks File Manager

The Bluestacks File Manager is a convenient way to transfer files between your PC and the emulator. Here’s how to do it:
- Open Bluestacks X on your PC.
- Click on the “BlueStacks File Manager” icon on the home screen or in the app drawer.
- In the File Manager, you will see two sections: “Local” and “Cloud.” Click on “Local” to access your PC’s file system.
- Locate the file or folder you want to transfer and drag it into the Bluestacks File Manager window.
- Once the file is in the File Manager, you can open it, share it, or install it directly from the emulator.
Using Windows File Explorer
Another method to transfer files to Bluestacks X is by using Windows File Explorer. Here’s how to do it:
- Open Windows File Explorer on your PC.
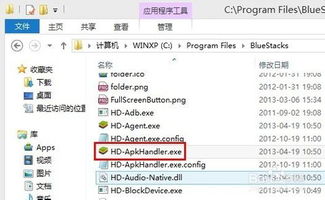
- Navigate to the location where your Bluestacks X installation is stored. By default, it is usually found in the “Program Files” folder.
- Open the “Bluestacks” folder, then the “Data” folder, and finally the “AppData” folder.
- Inside the “AppData” folder, you will find a folder named “SharedData.” This is where you can place files to be accessed by Bluestacks X.
- Drag and drop the file or folder you want to transfer into the “SharedData” folder.
- Bluestacks X will automatically detect the new file and make it available for use.
Using Cloud Storage Services
Cloud storage services like Google Drive, Dropbox, and OneDrive offer a convenient way to transfer files between your PC and Bluestacks X. Here’s how to do it:
- Upload the file you want to transfer to your chosen cloud storage service.
- Open Bluestacks X on your PC.
- Open the cloud storage app within Bluestacks X (e.g., Google Drive, Dropbox, or OneDrive).
- Log in to your account and access the file you uploaded.
- Download the file from the cloud storage app to Bluestacks X.
Using Third-Party File Transfer Tools
There are several third-party file transfer tools available that can help you move files to Bluestacks X. Some popular options include:
- ApowerManager: This tool allows you to transfer files, manage apps, and even mirror your phone screen to your PC.
- Apowersoft Phone Manager: Similar to ApowerManager, this tool offers file transfer, app management, and screen mirroring features.
- TeamViewer: While primarily a remote desktop tool, TeamViewer can also be used to transfer files between your PC and Bluestacks X.
These tools typically require you to install a small application on your PC and Bluestacks X. Once installed, you can transfer files by dragging and dropping them between the two devices.
Additional Tips
Here are some additional tips to ensure a smooth file transfer experience:
- Make sure you have enough storage space on your PC and Bluestacks X to accommodate the files you want to transfer.
- Close any unnecessary applications on your PC before starting the file transfer process to ensure optimal performance.
- Check the file permissions on your PC to ensure you have the necessary rights to access and transfer the files.
- Keep your Bluestacks X emulator updated to the latest version to take advantage of the latest features and improvements.
By following these methods


