
Download Program File Windows 10: A Comprehensive Guide
Are you looking to download a program file on Windows 10? Whether it’s for work, entertainment, or productivity, downloading and installing programs is a fundamental skill for any Windows user. In this detailed guide, I’ll walk you through the process step by step, ensuring you have a seamless experience.
Understanding Program Files

Before diving into the download process, it’s important to understand what program files are. Program files are collections of data and instructions that make up a software application. When you download a program file, you’re essentially downloading the entire application, which you can then install on your computer.
Locating the Program File
Once you’ve found the program you want to download, it’s time to locate the program file. Most programs will have a download link on their website, often labeled as “Download” or “Get Started.” Clicking on this link will begin the download process.
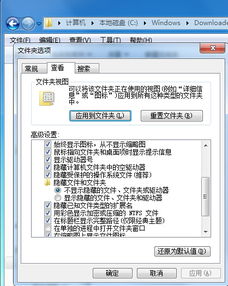
Using the Windows 10 File Explorer
After downloading the program file, it will typically be saved in your default download folder. To find this folder, open the Windows 10 File Explorer by clicking on the folder icon in the taskbar or pressing the Windows key + E. Once in the File Explorer, navigate to the following path:
| Path | Description |
|---|---|
| Downloads | Your default download folder |
Within the Downloads folder, you should find the program file you downloaded. Double-clicking on the file will typically launch the installation process.
Using Third-Party Download Managers
While the Windows 10 File Explorer is sufficient for most downloads, some users prefer using third-party download managers. These tools offer additional features, such as the ability to pause and resume downloads, download multiple files simultaneously, and organize your downloads more efficiently.
Here’s how to use a third-party download manager:
- Download and install a reputable download manager from a trusted source.
- Open the download manager and paste the program’s download link into the provided field.
- Click the “Download” button, and the program file will be saved to your chosen location.
- Follow the same steps as outlined in the previous section to install the program.
Verifying the Program File
Before installing a program, it’s crucial to verify the program file’s integrity. This ensures that the file hasn’t been corrupted or tampered with during the download process. Here’s how to verify a program file:
- Right-click on the program file and select “Properties.” This will open a new window with various tabs.
- Click on the “Details” tab. Here, you’ll find information about the file, including its size, version, and digital signature.
- Check the file’s size and version against the information provided by the program’s developer. If they match, the file is likely safe to install.
- Click on the “Digital Signatures” tab. If the file is signed by a trusted publisher, you’ll see a list of available signatures. Click on “Verify” to ensure the file’s integrity.
Installing the Program
Once you’ve verified the program file, it’s time to install the program. Here’s how to do it:
- Double-click on the program file to launch the installation wizard.
- Follow the on-screen instructions provided by the installer. This may include agreeing to the program’s license agreement, choosing an installation location, and selecting additional features.
- Once the installation is complete, you may need to restart your computer for the changes to take effect.
Updating the Program
After installing a program, it’s important to keep it up to date. Program updates often include bug fixes, security patches, and new features. Here’s how to update a program:
- Open the program and look for an “Update” or “Check for Updates” option in the menu or settings.
- Follow the on-screen instructions to download and install the latest updates.
- Restart your computer if prompted to complete the update process.


