
How to Save Screen Recording to Files Max
Screen recording has become an essential tool for various purposes, from creating tutorials to capturing gameplay. Whether you’re a professional content creator or just someone looking to save a memorable moment, knowing how to save your screen recordings effectively is crucial. In this article, we will delve into multiple dimensions to help you save screen recordings to files with maximum efficiency.
Choosing the Right Screen Recording Software

Before you start recording your screen, it’s important to choose the right software. There are numerous options available, each with its own set of features and capabilities. Here are a few popular choices:
| Software | Platform | Key Features |
|---|---|---|
| OBS Studio | Windows, macOS, Linux | Free, open-source, customizable settings, supports multiple streaming platforms |
| Camtasia | Windows | Easy-to-use interface, built-in video editor, screen recording, and audio recording |
| Bandicam | Windows | High-quality screen recording, game recording, and streaming |
| Apowersoft Screen Recorder | Windows, macOS | Free version available, simple interface, supports various recording formats |
When selecting a screen recording software, consider factors such as your operating system, budget, and specific needs. Some software may offer more advanced features, while others may be more user-friendly.
Understanding Screen Recording Settings
Once you have chosen your screen recording software, it’s important to understand its settings. Here are some key settings to pay attention to:
- Resolution: Choose a resolution that suits your needs. Higher resolutions will result in larger file sizes, while lower resolutions may result in pixelated video quality.
- Frame Rate: The frame rate determines how smooth your video will appear. A higher frame rate will result in a smoother video, but it will also increase the file size.
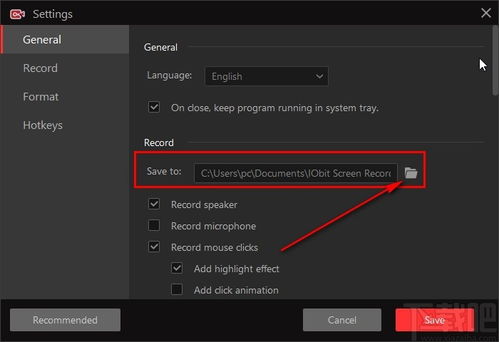
- Audio Settings: Ensure that your audio settings are configured correctly. You may want to record your voiceover, system audio, or both.
- Recording Area: Choose the area of your screen you want to record. Some software allows you to select a specific window or the entire screen.
Experiment with different settings to find the optimal balance between video quality and file size.
Recording Your Screen
Now that you have your software and settings ready, it’s time to record your screen. Follow these steps:
- Open your screen recording software and select the desired recording area.
- Configure your audio settings, if necessary.
- Click the “Start Recording” button and begin your screen recording.
- Perform your desired actions on the screen.
- When you’re done, click the “Stop Recording” button.
Your screen recording will now be saved to your computer. The location of the saved file will depend on your software’s settings.
Exporting and Saving Your Screen Recording
After recording your screen, you may need to export and save your video in a specific format. Here’s how to do it:
- Open the video file in your screen recording software.
- Select the desired export format (e.g., MP4, AVI, MOV).
- Choose the desired quality settings.
- Click the “Export” or “Save” button.
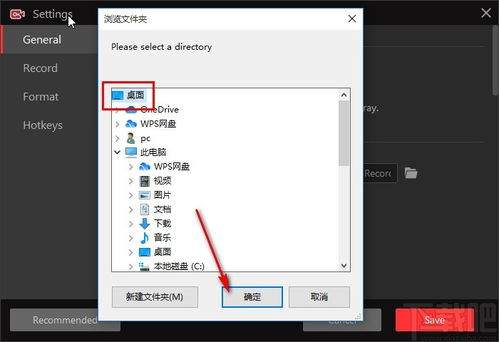
- Select a location on your computer to save the file.
Some software may offer additional options, such as adding watermarks or customizing the video’s metadata. Explore these options to enhance your screen recording.
Optimizing Your Screen Recording
Once you have saved your screen recording, you may want to optimize it for better quality or compatibility. Here are a few tips:


