
How to Move Files to BlueStacks from PC: A Detailed Guide
BlueStacks is a popular Android emulator that allows you to run Android apps and games on your PC. One of the most common tasks you might want to do is move files from your PC to BlueStacks. Whether you’re transferring documents, media files, or apps, this guide will walk you through the process step by step.
Understanding BlueStacks File System

Before you start transferring files, it’s important to understand the BlueStacks file system. BlueStacks creates a virtual Android environment on your PC, which includes its own internal storage. This storage is separate from your PC’s main storage, so files you transfer will not be visible on your PC’s file explorer.
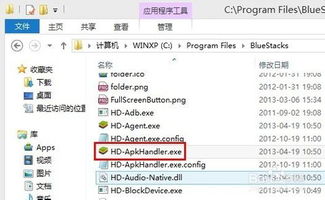
Using Windows File Explorer
One of the simplest ways to transfer files to BlueStacks is by using Windows File Explorer. Here’s how you can do it:
- Open BlueStacks and wait for it to fully load.
- Open Windows File Explorer on your PC.
- In the address bar, type in the following path: `C:UsersYourUsernameAppDataLocalBlueStacksAndroidobbcom.yourappname` (replace `YourUsername` with your actual username and `com.yourappname` with the package name of the app you want to transfer files to). This will take you directly to the OBB folder of the app.
- Copy the files you want to transfer from your PC to the OBB folder.
- Paste the files into the OBB folder in BlueStacks.
- Restart BlueStacks to ensure the changes take effect.
Using BlueStacks File Manager
BlueStacks also comes with its own file manager, which makes it easy to transfer files directly from your PC. Here’s how to do it:
- Open BlueStacks and go to the “All Apps” section.
- Find and open the “BlueStacks File Manager” app.
- In the File Manager, tap on the “External Storage” or “Internal Storage” option.
- Connect your PC to BlueStacks using a USB cable.
- On your PC, open the folder containing the files you want to transfer.
- Drag and drop the files from your PC to the BlueStacks File Manager.
- Once the transfer is complete, disconnect your PC from BlueStacks.
Using Third-Party File Transfer Tools
There are several third-party file transfer tools available that can make the process even easier. Some popular options include:
| Tool | Description |
|---|---|
| ApowerManager | ApowerManager is a versatile tool that allows you to transfer files, manage apps, and even mirror your phone screen to your PC. |
| TeamViewer | TeamViewer is a remote desktop tool that can be used to transfer files between your PC and BlueStacks. |
| ShareIt | ShareIt is a file transfer app that supports multiple platforms and can be used to transfer files to BlueStacks. |
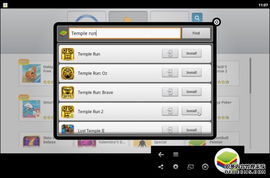
Transferring Apps to BlueStacks
Transferring apps to BlueStacks is a straightforward process. Here’s how you can do it:
- Open BlueStacks and go to the “All Apps” section.
- Click on the “App Center” icon.
- Search for the app you want to install.
- Click on the app and then click “Install.”
- Wait for the app to install.
Conclusion
Moving files to BlueStacks from your PC is a simple process, whether you’re using Windows File Explorer, BlueStacks File Manager, or a third-party file transfer tool. By following the steps outlined in this guide, you’ll be able to easily transfer files and apps to your BlueStacks environment.


