
Final Cut Pro: Keep Render Files Separated
As a video editor, managing your render files efficiently is crucial for maintaining a smooth workflow. One of the most effective ways to do this in Final Cut Pro is by keeping your render files separated. This not only helps in organizing your project but also ensures that your system runs more efficiently. Let’s delve into the details of how to achieve this.
Understanding Render Files

Render files are the output files created when you render a sequence in Final Cut Pro. These files are essential for playback and exporting your project. However, if not managed properly, they can clutter your project and slow down your system.
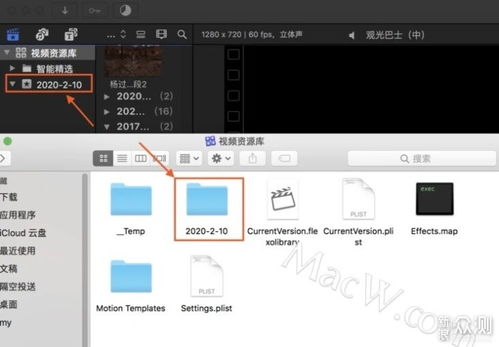
Render files are typically stored in the same folder as your project. By default, Final Cut Pro creates a subfolder named “Render Files” within your project folder. However, you can choose to keep them separate for better organization.
Why Keep Render Files Separated?
There are several reasons why you should consider keeping your render files separated:
-
Organizational Clarity: Keeping render files separate from your project files makes it easier to locate and manage them. This is especially useful when working on large projects with multiple sequences.
-
System Performance: Storing render files in a separate location can improve your system’s performance. This is because it reduces the risk of your project folder becoming too large and slowing down your computer.
-
Backup and Recovery: Keeping render files separate makes it easier to back up and recover your project. In case of data loss, you can quickly locate and restore your render files without affecting your project files.
How to Keep Render Files Separated in Final Cut Pro

Follow these steps to keep your render files separated in Final Cut Pro:
-
Open your project in Final Cut Pro.
-
Go to the “File” menu and select “Project Settings” > “Render Settings” > “Render Files” > “Render Files Folder” > “Choose” > “New Folder” > “Name the Folder” > “OK”.
-
Select the new folder you created and click “OK” to confirm the change.
-
Render your sequence as usual. Final Cut Pro will now save the render files in the new folder you specified.
Additional Tips
Here are some additional tips to help you manage your render files effectively:
-
Regularly Clean Up: Periodically delete old render files to free up space and maintain a clutter-free project folder.
-
Use a Consistent Naming Convention: Assign a consistent naming convention to your render files for easy identification and organization.
-
Backup Render Files: Make sure to back up your render files regularly to prevent data loss.
Conclusion
Keeping your render files separated in Final Cut Pro can significantly improve your workflow and system performance. By following the steps outlined in this article, you can easily manage your render files and maintain an organized project. Remember to regularly clean up and backup your render files to ensure a smooth editing process.
| Step | Description |
|---|---|
| 1 | Open your project in Final Cut Pro. |
| 2 | Go to the “File” menu and select “Project Settings” > “Render Settings” > “Render Files” > “Render Files Folder” > “Choose” > “New Folder” > “Name the Folder” > “OK”. |
| 3 | Select the new folder you created and click “OK” to confirm the change. |
| 4 | Render your sequence as usual. Final Cut Pro will now save the render files in the new folder you specified. |


