
Understanding OneDrive and Its Removal

OneDrive is a cloud storage service provided by Microsoft, which allows users to store, sync, and share files across multiple devices. However, there may come a time when you need to remove OneDrive completely from your system and return your files to local storage. This guide will walk you through the process step by step.
Step 1: Backup Your Files

Before you proceed with removing OneDrive, it’s crucial to ensure that all your important files are backed up. This is to prevent any accidental loss of data. You can copy your files from the OneDrive folder to another location on your computer or an external drive.
Step 2: Uninstall OneDrive
OneDrive is integrated into Windows 10 and 11, so you can’t simply delete it like a regular program. Instead, you need to uninstall it through the Settings app.
| Step | Action |
|---|---|
| 1 | Open the Settings app by clicking on the Start button and selecting “Settings” or pressing “Win + I” on your keyboard. |
| 2 | In the Settings window, click on “Apps” and then “Apps & features” on the left-hand side. |
| 3 | Scroll down and find “OneDrive” in the list of installed apps. |
| 4 | Click on “OneDrive” and then click on “Uninstall” in the pop-up window. |
| 5 | Follow the prompts to complete the uninstallation process. |
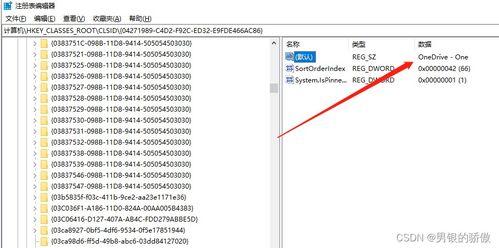
Step 3: Remove OneDrive from File Explorer
After uninstalling OneDrive, you may still see it in File Explorer. To remove it, you need to change the File Explorer settings.
| Step | Action |
|---|---|
| 1 | Open File Explorer by clicking on the folder icon in the taskbar or pressing “Win + E” on your keyboard. |
| 2 | Click on the “View” tab at the top of the window. |
| 3 | Uncheck the “File Explorer Options” button on the right side of the window. |
| 4 | In the File Explorer Options window, go to the “View” tab. |
| 5 | Under the “Hidden files and folders” section, select “Show hidden files, folders, and drives.” Then, click “Apply” and “OK” to save the changes. |
Step 4: Delete OneDrive Folders
Now that OneDrive is uninstalled and removed from File Explorer, you can delete the OneDrive folders from your computer.
| Step | Action |
|---|---|
| 1 | Open File Explorer and navigate to the following locations: |
| 2 | For Windows 10 and 11: C:UsersYourUsernameOneDrive |
| 3 | For Windows 7: C:UsersYourUsernameDocumentsOneDrive |
| 4 | Delete the OneDrive folder and all its contents. |
Step 5: Remove OneDrive from the Start Menu
OneDrive may still be listed in the Start menu. To


