
Windows 11 Clean Temp Files Command Line: A Comprehensive Guide
Managing temporary files on your Windows 11 system is crucial for maintaining optimal performance and freeing up valuable disk space. The Command Prompt offers a powerful tool to clean these files efficiently. In this guide, I’ll walk you through the process step by step, ensuring you can effectively clean temporary files using the command line.
Understanding Temporary Files

Temporary files are created by various applications and the operating system itself. They serve as placeholders for data that is being processed or stored temporarily. Over time, these files can accumulate, leading to reduced system performance and disk space issues.
Temporary files are typically stored in the following locations:
- C:UsersYourUsernameAppDataLocalTemp
- C:UsersYourUsernameAppDataRoamingTemp
- C:WindowsTemp
Accessing Command Prompt
Before you can clean temporary files using the command line, you need to access the Command Prompt. Here’s how:
- Press the Windows key and type “cmd” in the search bar.
- Right-click on “Command Prompt” and select “Run as administrator” from the context menu.
Cleaning Temporary Files
Once you have the Command Prompt open, you can use the following commands to clean temporary files:
1. Cleaning Temporary Files in User’s Folder
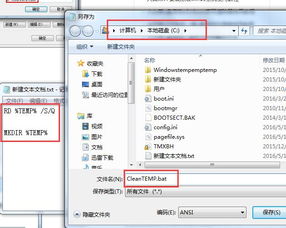
Use the following command to clean temporary files in the user’s folder:
rd /s /q C:UsersYourUsernameAppDataLocalTempThis command will delete all temporary files in the specified folder. Be cautious when using this command, as it will permanently delete files.
2. Cleaning Temporary Files in Roaming Folder
Use the following command to clean temporary files in the roaming folder:
rd /s /q C:UsersYourUsernameAppDataRoamingTempSimilar to the previous command, this will delete all temporary files in the specified folder.
3. Cleaning Temporary Files in Windows Folder
Use the following command to clean temporary files in the Windows folder:
rd /s /q C:WindowsTempThis command will delete all temporary files in the Windows folder. Again, be cautious as it will permanently delete files.
Verifying the Cleanup
After running the cleanup commands, it’s essential to verify that the temporary files have been removed. You can do this by navigating to the respective folders and checking for the presence of temporary files.
Additional Tips
Here are some additional tips to help you manage temporary files on your Windows 11 system:
- Regularly clean temporary files to maintain system performance.
- Use third-party disk cleanup tools for more advanced cleaning options.
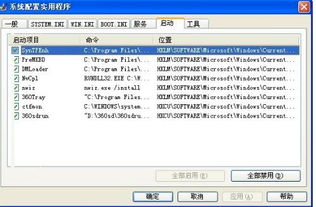
- Disable unnecessary startup programs to reduce the number of temporary files created.
Conclusion
Cleaning temporary files using the command line in Windows 11 is a straightforward process. By following the steps outlined in this guide, you can efficiently manage and free up disk space on your system. Remember to be cautious when deleting files, as some temporary files may be necessary for the proper functioning of certain applications.


