
Mac OS Show Hidden Files: A Comprehensive Guide
Managing files on your Mac can sometimes be a daunting task, especially when you have a plethora of hidden files cluttering up your directories. These hidden files, often created by the system or third-party applications, can be crucial for the smooth functioning of your computer. However, they can also be a source of confusion and frustration if you’re not aware of their presence. In this guide, I’ll walk you through the process of showing hidden files on your Mac, providing you with a multi-dimensional approach to managing your file system.
Why Show Hidden Files?

Before diving into the steps, let’s understand why you might want to show hidden files on your Mac. Hidden files can include system files, cache files, and other important data that, if deleted or modified incorrectly, can cause issues with your computer’s performance. By showing these files, you can gain better control over your file system, clean up unnecessary files, and even troubleshoot certain problems.
Method 1: Using the Terminal
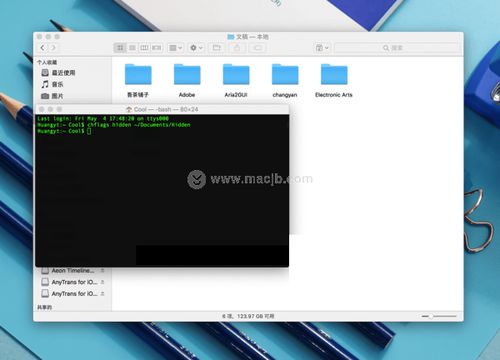
The Terminal is a powerful tool that allows you to execute commands directly on your Mac. To show hidden files using the Terminal, follow these steps:
- Open the Terminal application, which can be found in the /Applications/Utilities/ folder.
- Enter the following command:
defaults write com.apple.finder AppleShowAllFiles YES - Press Enter and then close the Terminal.
- Restart your Mac for the changes to take effect.
Alternatively, to hide the hidden files, you can use the following command:
defaults write com.apple.finder AppleShowAllFiles NO
This method is quite straightforward and doesn’t require any additional software installations. However, it’s worth noting that the changes made through the Terminal will only last until you restart your Mac. To make the changes permanent, you’ll need to modify the com.apple.finder.plist file, which is a more advanced task and requires editing the file manually.
Method 2: Using the Finder Preferences
Another way to show hidden files on your Mac is by using the Finder preferences. This method is more user-friendly and doesn’t require any command-line knowledge. Here’s how to do it:
- Open the Finder application on your Mac.
- Go to the menu bar and click on “Finder” > “Preferences” > “Advanced” (or press Command + , to open the preferences directly).
- Check the box next to “Show hidden files, folders, and drives on the desktop.” This will make hidden files visible on your desktop.
- Check the box next to “Show all filename extensions.” This will display the file extensions for all files, making it easier to identify hidden files.
- Check the box next to “Show icon preview.” This will show a preview of the file’s content in the Finder window, which can be helpful when dealing with hidden files.
- Check the box next to “Show status bar.” This will display additional information about the files and folders in the Finder window.
- Check the box next to “Show path bar.” This will show the path to the current folder in the Finder window.
- Check the box next to “Open windows in columns.” This will open new Finder windows in a column view, making it easier to navigate through directories.
- Check the box next to “Keep folders on top when sorting by name.” This will ensure that folders appear at the top of the list when sorting files by name.
- Check the box next to “Sort items as they appear in the folder.” This will sort files and folders based on their actual names, rather than the alphabetical order.
- Check the box next to “Use All Folders for Sidebar.” This will display all folders in the sidebar, including hidden ones.
- Check the box next to “Show Library Folder in Sidebar.” This will display the Library folder in the sidebar, which contains many hidden files and folders.
- Check the box next to “Show Home Folder.” This will display the Home folder in the sidebar.
- Check the box next to “Show Parent Folder.” This will display the parent folder in the Finder window.
- Check the box next to “Show Pathbar.” This will display the path to the current folder in the Finder window.
- Check the box next to “Show Status Bar.”


