 Files in Premiere Pro 2023")
How to Install Mocha MochaRT (Mogrt) Files in Premiere Pro 2023
Are you looking to enhance your Premiere Pro 2023 projects with dynamic and professional-looking effects? Mocha MochaRT (Mogrt) files are a fantastic way to achieve this. These files contain pre-made Mocha effects that can be easily imported and applied to your video clips. In this guide, I’ll walk you through the process of installing Mogrt files in Premiere Pro 2023, ensuring you get the most out of your editing experience.
Step 1: Download Mocha MochaRT (Mogrt) Files
 Files in Premiere Pro 2023")
Before you can install Mogrt files in Premiere Pro, you need to download them. There are numerous websites where you can find free and paid Mogrt files. Some popular sources include RedGiant, Video Copilot, and Mocha itself. Make sure to choose files that are compatible with Premiere Pro 2023.
Step 2: Locate the Mocha MochaRT (Mogrt) Files
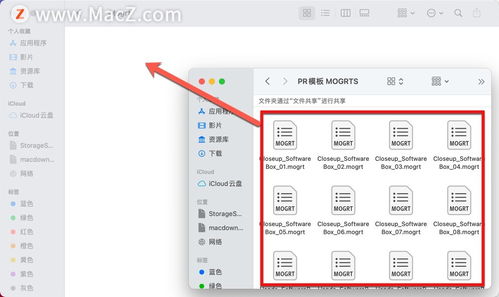
Once you’ve downloaded the Mogrt files, it’s essential to locate them on your computer. You can usually find them in the “Downloads” folder or the folder where you saved them. If you’re having trouble finding them, use the search function on your computer to locate the files by name.
Step 3: Open Premiere Pro 2023
With the Mogrt files located, open Premiere Pro 2023 on your computer. If you haven’t already installed the software, you can download it from Adobe’s official website.
Step 4: Import the Mocha MochaRT (Mogrt) Files
With Premiere Pro open, go to the “File” menu and select “Import.” Then, choose “Mocha MochaRT (Mogrt) Files.” This will open a window where you can navigate to the folder containing your downloaded Mogrt files.
Here’s a table to help you understand the process:
| Step | Action |
|---|---|
| 1 | Go to the “File” menu |
| 2 | Select “Import” |
| 3 | Choose “Mocha MochaRT (Mogrt) Files” |
| 4 | Locate and select the Mogrt files |
Step 5: Apply the Mocha MochaRT (Mogrt) Files
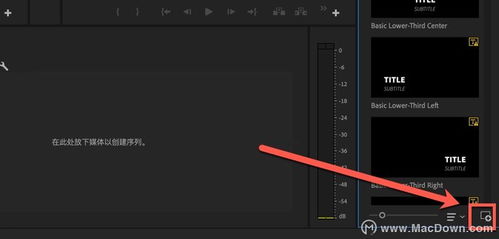
After importing the Mogrt files, they will appear in the “Effects” panel under the “Mocha” category. To apply a Mogrt effect to a video clip, simply drag and drop the effect onto the clip in your timeline.
Here’s a table to help you understand the process:
| Step | Action |
|---|---|
| 1 | Open the “Effects” panel |
| 2 | Go to the “Mocha” category |
| 3 | Drag and drop the desired Mogrt effect onto a video clip |
Step 6: Adjust the Mocha MochaRT (Mogrt) Effect
Once you’ve applied a Mogrt effect to a video clip, you can adjust its settings to fit your project. This may include adjusting the duration, position, and other parameters specific to the effect. To do this, click on the effect in the timeline, and a panel with the effect’s settings will appear.
Step 7: Save and Export Your Project
After you’ve applied and adjusted the Mogrt effects to your satisfaction, save your project and export it as you normally would. You can export your project in various formats, such as MP4, MOV, or even as a web video.
By following these steps, you should now be able to install


