
Add File to VS Code Project: A Detailed Guide
Adding a file to your Visual Studio Code (VS Code) project is a fundamental task that every developer encounters at some point. Whether you’re starting a new project or integrating an existing codebase, understanding how to add files to your project efficiently can greatly enhance your workflow. In this guide, I’ll walk you through the process from start to finish, covering various aspects and scenarios.
Understanding Your Project Structure

Before diving into the specifics of adding files, it’s crucial to have a clear understanding of your project’s structure. VS Code projects typically consist of a root directory containing source files, configuration files, and sometimes additional resources like images or documentation.
Your project’s root directory might look something like this:
my-project/鈹溾攢鈹€ src/鈹? 鈹溾攢鈹€ main/鈹? 鈹? 鈹溾攢鈹€ java/鈹? 鈹? 鈹斺攢鈹€ resources/鈹? 鈹斺攢鈹€ test/鈹? 鈹溾攢鈹€ java/鈹? 鈹斺攢鈹€ resources/鈹溾攢鈹€ pom.xml鈹斺攢鈹€ README.mdIn this example, the `src` directory contains the source code, while `pom.xml` is a Maven project’s configuration file. The `README.md` file provides documentation for the project.
Adding a New File
There are several ways to add a new file to your VS Code project. Here are the most common methods:
Using the Command Palette
The Command Palette is a powerful feature in VS Code that allows you to access various commands quickly. To add a new file using the Command Palette, follow these steps:
- Press `Ctrl+Shift+P` (or `Cmd+Shift+P` on macOS) to open the Command Palette.
- Start typing “Add File to Workspace” and select the corresponding option.
- Select the directory where you want to add the file.
- Enter the name of the file you want to create.
Using the Explorer
Another way to add a new file is by using the Explorer panel. Here’s how to do it:
- Open the Explorer panel by clicking on the icon on the left side of the VS Code window.
- Right-click on the directory where you want to add the file.
- Select “New File” from the context menu.
- Enter the name of the file you want to create.
Using the Quick Open
The Quick Open feature allows you to quickly navigate to any file in your project. To add a new file using Quick Open, follow these steps:
- Press `Ctrl+P` (or `Cmd+P` on macOS) to open the Quick Open panel.
- Start typing “new file” and select the corresponding option.
- Select the directory where you want to add the file.
- Enter the name of the file you want to create.
Adding an Existing File
Adding an existing file to your VS Code project is just as straightforward. Here’s how to do it:
- Open the Explorer panel.
- Drag and drop the file you want to add into the project directory.
- VS Code will automatically add the file to your project.
Configuring File Types
VS Code uses file extensions to determine the type of a file and apply the appropriate syntax highlighting and features. To configure file types, follow these steps:
- Open the Command Palette.
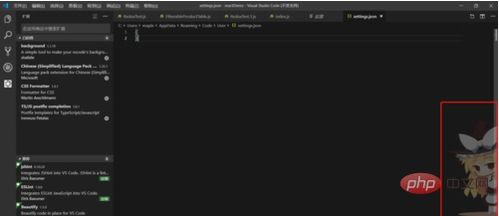
- Start typing “Preferences: Open Settings (JSON)” and select the corresponding option.
- Scroll down to the “Files: Association” section.
- Enter the file extension you want to associate with a specific language or file type.
For example, to associate the `.txt` file extension with the Markdown language, you would add the following line to the settings file:
"files.associations": { ".txt": "markdown"}Conclusion
Adding files to your VS Code project is a fundamental skill that every developer should master. By following the steps outlined in this guide, you can efficiently add new files and integrate existing files into your project


