
How to Compare Two Excel Files: A Detailed Guide
Comparing two Excel files can be a daunting task, especially when you have a large amount of data to analyze. However, with the right approach and tools, you can efficiently compare and identify differences between the two files. In this guide, I will walk you through the process step by step, ensuring that you can effectively compare your Excel files.
Understanding the Purpose of Comparison

Before diving into the comparison process, it’s essential to understand why you need to compare the two Excel files. Are you looking for discrepancies in data, identifying changes over time, or simply verifying the accuracy of the information? Knowing your purpose will help you choose the appropriate method for comparison.
Manual Comparison

For small files or when you have limited time, a manual comparison might be sufficient. Here’s how you can do it:
-
Open both Excel files side by side.
-
Start by comparing the headers to ensure both files have the same columns.
-
Scan through the data row by row, looking for any discrepancies.
-
Highlight or make notes of any differences you find.
This method is time-consuming and prone to human error, especially for large files. However, it can be effective for small datasets or when you need a quick visual inspection.
Using Excel’s Built-in Features
Excel offers several built-in features that can help you compare two files more efficiently:
1. Compare and Merge Workbooks
This feature allows you to compare two workbooks and merge their differences into a new workbook. Here’s how to use it:
-
Open both Excel files.
-
Go to the “Data” tab in the ribbon.
-
Click on “Compare and Merge Workbooks” in the “Data Tools” group.
-
Select the first workbook and click “OK” to open it.
-
Select the second workbook and click “OK” to open it.
-
Select the comparison options you want to use (e.g., compare only visible cells, compare formulas, etc.).
-
Click “OK” to start the comparison process.
-
Excel will create a new workbook with the differences highlighted.
2. Conditional Formatting
Conditional formatting can help you quickly identify differences between two files. Here’s how to use it:
-
Open both Excel files.
-
Select the range of cells you want to compare.
-
Go to the “Home” tab in the ribbon.
-
Click on “Conditional Formatting” in the “Styles” group.
-
Select “New Rule” and choose “Use a formula to determine which cells to format.”
-
Enter a formula that identifies the differences between the two files (e.g., `=$A1<>$A2` for comparing cell values).
-
Select a format for the cells with differences (e.g., a different color or font style).
-
Click “OK” to apply the formatting.
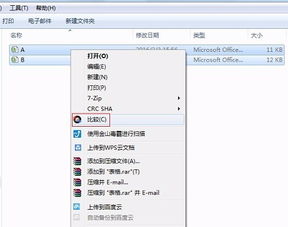
Using Third-Party Tools
For more advanced comparison needs, you might want to consider using third-party tools. Some popular options include:
-
Microsoft Power Query
-
Excel Compare
-
Diffchecker
These tools offer more advanced features, such as comparing multiple files, handling large datasets, and generating detailed reports.
Best Practices
Here are some best practices to keep in mind when comparing Excel files:
-
Always work with copies of the original files to avoid accidental modifications.
-
Use consistent formatting and naming conventions for your files.
-
Document your comparison process and findings.
<


