
Boot ISO File from USB: A Comprehensive Guide
Are you looking to boot an ISO file from a USB drive? This process can be incredibly useful for installing operating systems, running diagnostics, or even testing software without the need for a CD or DVD. In this guide, I’ll walk you through the steps to boot an ISO file from a USB drive, covering various operating systems and methods. Let’s dive in!
Understanding ISO Files

Before we proceed, it’s essential to understand what an ISO file is. An ISO file is an archive file that contains the complete contents of an optical disc, such as a CD or DVD. It can be used to create a bootable USB drive, allowing you to install or run software from the USB drive itself.
Creating a Bootable USB Drive
Creating a bootable USB drive is the first step in the process. Here’s how to do it on different operating systems:
Windows
1. Download a tool like Rufus or balenaEtcher.
2. Insert your USB drive into your computer.
3. Open the tool and select your USB drive from the list of devices.
4. Click on the “Select” button and choose the ISO file you want to boot from.
5. Click on “Start” and wait for the process to complete.
macOS
1. Download a tool like balenaEtcher or Disk Utility.
2. Insert your USB drive into your Mac.
3. Open balenaEtcher and select your USB drive from the list of devices.
4. Click on the “Select Image” button and choose the ISO file you want to boot from.
5. Click on “Flash!” and wait for the process to complete.
Linux
1. Download a tool like balenaEtcher or dd.
2. Insert your USB drive into your Linux computer.
3. Open a terminal window.
4. Use the following command to create a bootable USB drive:
sudo dd if=/path/to/iso of=/dev/sdX bs=4M status=progressReplace /path/to/iso with the path to your ISO file and /dev/sdX with the device name of your USB drive.
Boot from USB Drive
Once you have created a bootable USB drive, you need to configure your computer to boot from it. Here’s how to do it on different operating systems:
Windows
1. Restart your computer and enter the BIOS or UEFI setup by pressing the appropriate key (usually F2, F10, or DEL) during the boot process.
2. Navigate to the “Boot” or “Boot Options” section.
3. Change the boot order so that your USB drive is listed before your hard drive.
4. Save your changes and exit the BIOS or UEFI setup.
macOS
1. Restart your Mac and hold down the Option (Alt) key during the boot process.
2. Select your USB drive from the list of bootable devices.
3. Press Enter to boot from the USB drive.
Linux
1. Restart your Linux computer.
2. During the boot process, press the appropriate key (usually F12 or ESC) to enter the boot menu.
3. Select your USB drive from the list of bootable devices.
4. Press Enter to boot from the USB drive.
Additional Tips
Here are some additional tips to ensure a smooth booting experience:
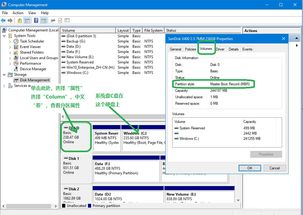
- Ensure your USB drive is formatted with a compatible file system (e.g., FAT32, NTFS, or ext2/3/4).
- Check the USB drive’s speed and compatibility with your computer.
- Backup any important data on your USB drive before proceeding.
By following this guide, you should now be able to boot an ISO file from a USB drive on your computer. Whether you’re installing a new operating system or running diagnostics, this process can save you time and effort. Happy booting!


