
Dealing with “Hyper-V No Option to Boot from File” Error
Are you facing the frustrating “Hyper-V No Option to Boot from File” error while trying to set up a virtual machine? This issue can arise due to various reasons, and it’s essential to understand the problem thoroughly to find an effective solution. In this article, we will delve into the possible causes of this error and provide you with detailed steps to resolve it. Let’s get started.
Understanding the Error

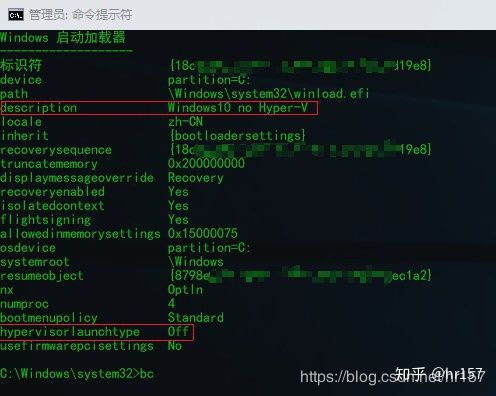
The “Hyper-V No Option to Boot from File” error occurs when you try to boot a virtual machine from a file, but the option is not available in the boot menu. This can happen due to several reasons, such as incorrect settings, missing drivers, or hardware issues.
Causes of the Error
Here are some common causes of the “Hyper-V No Option to Boot from File” error:
-
Incorrectly configured virtual machine settings
-
Missing or outdated Hyper-V drivers
-
BIOS or UEFI settings not optimized for virtualization
-
Hardware-assisted virtualization not enabled in the BIOS or UEFI
-
Corrupted virtual machine files
Resolving the Error
Now that we understand the possible causes, let’s explore the steps to resolve the “Hyper-V No Option to Boot from File” error.
Step 1: Check Virtual Machine Settings
Ensure that the virtual machine settings are correctly configured. Follow these steps:
-
Open Hyper-V Manager and select the virtual machine you want to boot.
-
In the Actions pane, click on “Settings” to open the settings menu.
-
Under the “Boot” section, make sure the “Boot order” is set to “CD/DVD drive” or “Hard disk drive” (HDD) and that the correct ISO file or virtual hard disk file is selected.
-
Check the “Enable virtualization extensions” option is enabled.
-
Click “OK” to save the changes.
Step 2: Update Hyper-V Drivers
Outdated or missing Hyper-V drivers can cause the error. To update the drivers:
-
Open Device Manager by pressing Windows key + X and selecting “Device Manager” from the list.
-
Expand the “Hyper-V” category and right-click on each device.
-
Select “Update driver” and follow the on-screen instructions to install the latest drivers.
Step 3: Optimize BIOS or UEFI Settings
Ensure that your BIOS or UEFI settings are optimized for virtualization. To do this:
-
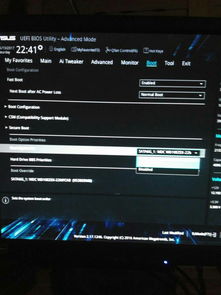
Restart your computer and enter the BIOS or UEFI setup by pressing the appropriate key (e.g., F2, Del, or Esc) during the boot process.
-
Look for the virtualization settings, such as “Virtualization Technology” or “Intel VT-x/AMD-V,” and enable them.
-
Save the changes and exit the BIOS or UEFI setup.
Step 4: Enable Hardware-Assisted Virtualization
Hardware-assisted virtualization can significantly improve the performance of virtual machines. To enable it:
-
Open Device Manager and expand the “System devices” category.
-
Right-click on the “Virtualization Technology” device and select “Properties.”
-
Go to the “Driver” tab and click on “Update driver.”
-
Follow the on-screen instructions to install the latest drivers.
Step 5: Check Virtual Machine Files
Corrupted virtual machine files can cause the error. To check the files:
-
Open Hyper-V Manager and select the virtual machine you want to boot.
-
In the Actions pane, click on “Reset”


