
How to GitHub Files: A Comprehensive Guide
Managing files on GitHub is an essential skill for any developer. Whether you’re new to GitHub or looking to enhance your file management skills, this guide will walk you through the process step by step. From creating repositories to organizing files and collaborating with others, we’ll cover it all.
Creating a Repository

Before you can start managing files on GitHub, you need to create a repository. A repository is a storage location for all your project files. Here’s how to create one:
- Go to GitHub.com and log in to your account.
- Click on the “+” button in the upper-right corner and select “New repository” from the dropdown menu.
- Enter a name for your repository and choose a description if desired.
- Select the visibility level for your repository (public or private). Public repositories are accessible to everyone, while private repositories are only accessible to you and your collaborators.
- Choose whether to initialize this repository with a README, .gitignore, and a license. These are optional but recommended for new projects.
- Click “Create repository” to finish the process.
Adding Files to Your Repository
Once you have a repository, you can start adding files to it. Here’s how to do it:
- Go to your repository on GitHub.
- Click on the “Code” tab at the top of the page.
- Click on the “+” button in the upper-right corner to create a new file.
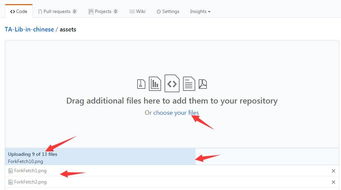
- Enter a name for your file and click “Create file.” You can also upload an existing file from your computer by clicking “Upload file.”
- Once the file is uploaded, you can edit it directly in the browser or download it to your computer for more advanced editing.
- After making changes, click “Propose file change” to submit your changes for review.
Organizing Your Files
As your project grows, it’s important to keep your files organized. Here are some tips for organizing your files on GitHub:
- Use a consistent naming convention for your files and directories.
- Group related files together in directories.
- Use a README file to provide an overview of your project and its structure.
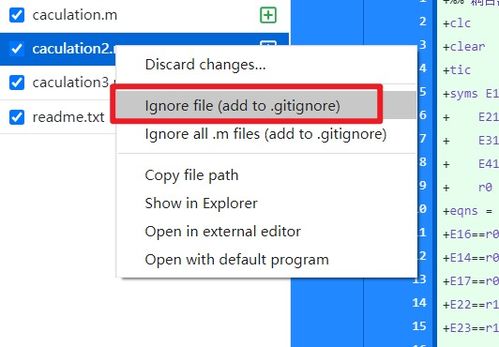
- Consider using a .gitignore file to exclude unnecessary files from your repository, such as compiled files or temporary files.
Collaborating with Others
One of the benefits of using GitHub is the ability to collaborate with others. Here’s how to work with collaborators on your repository:
- Invite collaborators to your repository by clicking on the “Settings” tab, then “Collaborators,” and entering their GitHub usernames.
- Collaborators can then make changes to the repository, just like you. You can review their changes and merge them into the main branch.
- GitHub provides a pull request feature that allows you to review changes before merging them into the main branch. This helps ensure that all changes are reviewed and approved before they are merged.
Branching and Merging
Branching and merging are essential concepts in version control, and they are integral to managing files on GitHub. Here’s a brief overview:
- A branch is a separate line of development that allows you to work on new features or fixes without affecting the main codebase.
- Creating a branch is as simple as clicking the “Branch” button on the repository page and entering a name for your new branch.
- Once you’ve finished working on your branch, you can merge it back into the main branch. This can be done by clicking the “Merge pull request” button on the branch page.
Using GitHub Desktop
GitHub Desktop is a desktop application that makes it easier to manage your GitHub repositories. Here’s how to use it:
- Download and install GitHub Desktop from GitHub Desktop’s website.
- Open GitHub Desktop and log in to your account.
- Click the “+” button to add a new repository. You


