
Insert PHP Header File in VSCode: A Comprehensive Guide
Are you a PHP developer looking to streamline your workflow in Visual Studio Code (VSCode)? One of the most common tasks in PHP development is inserting a header file at the beginning of your PHP scripts. This not only helps in maintaining consistency but also in organizing your code effectively. In this article, I’ll walk you through the process of inserting a PHP header file in VSCode, covering various aspects to ensure you have a seamless experience.
Understanding PHP Header Files

Before diving into the specifics of inserting a PHP header file in VSCode, it’s essential to understand what a header file is in PHP. A header file in PHP is a file that contains PHP code that is included at the beginning of another PHP file. It typically contains functions, constants, and other reusable code that you want to be available throughout your application.
Header files in PHP are denoted by the include or require statements. The include statement is used when the file may not exist, and it will not cause a fatal error if the file is not found. On the other hand, the require statement is used when the file is guaranteed to exist, and it will cause a fatal error if the file is not found.
Setting Up Your VSCode Environment
Before you can insert a PHP header file in VSCode, you need to ensure that your environment is properly set up. Here are the steps to follow:
- Install Visual Studio Code from https://code.visualstudio.com/download.
- Open VSCode and go to the Extensions view by clicking on the Extensions icon on the sidebar.
- Search for the “PHP Intellisense” extension and install it.
- Open your PHP project in VSCode.
Once you have set up your environment, you’re ready to insert a PHP header file.
Inserting a PHP Header File in VSCode
There are several ways to insert a PHP header file in VSCode. Here are the most common methods:
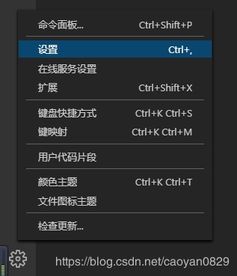
Method 1: Using the Command Palette
The Command Palette is a powerful feature in VSCode that allows you to access various commands quickly. To insert a PHP header file using the Command Palette, follow these steps:
- Press
Ctrl+Shift+P(orCmd+Shift+Pon macOS) to open the Command Palette. - Type “Insert PHP Header” and select the corresponding option.
- Select the header file you want to include from the list of available files.
Method 2: Using the Quick Open Feature
The Quick Open feature in VSCode allows you to quickly open files, folders, and other items in your project. To insert a PHP header file using Quick Open, follow these steps:
- Press
Ctrl+P(orCmd+Pon macOS) to open the Quick Open feature. - Start typing the name of the header file you want to include.
- Select the header file from the list of suggestions.
Method 3: Manually Typing the Include Statement
For those who prefer a more hands-on approach, you can manually type the include statement in your PHP file. Here’s how to do it:
- Open the PHP file where you want to insert the header file.
- At the top of the file, add the following line of code:
require 'header.php';Replace ‘header.php’ with the actual name of your header file.
Method 4: Using the “Insert” Command
VSCode provides a built-in “Insert” command that allows you to insert text at the cursor’s position. To insert a PHP header file using the “Insert” command, follow these steps:
- Open the PHP file where you want to insert the header file.
- Position the cursor at the top of the file.
- Press
Ctrl+Shift+I(or <


