
Batch Rename Files in Mac Sequoia: A Comprehensive Guide
Managing a large number of files on your Mac can be a daunting task, especially when you need to rename them all at once. This is where Sequoia, a powerful file renaming tool, comes into play. In this detailed guide, I’ll walk you through the process of using Sequoia to batch rename files on your Mac. Whether you’re a seasoned pro or a beginner, this guide will help you navigate the ins and outs of this remarkable tool.
Understanding Sequoia

Sequoia is a versatile file renaming tool designed for Mac users. It offers a wide range of features that make it easy to rename files in bulk, including support for regular expressions, custom templates, and batch processing. With Sequoia, you can rename files based on various criteria, such as file name, extension, date, and more.
Getting Started with Sequoia
Before you can start renaming files with Sequoia, you’ll need to download and install the application. You can find the latest version of Sequoia on the official website, where you’ll also find information about system requirements and compatibility.
Once you’ve downloaded and installed Sequoia, launch the application. You’ll be greeted with a user-friendly interface that makes it easy to navigate and use the tool.
Selecting Files for Renaming
One of the first things you’ll need to do is select the files you want to rename. Sequoia allows you to select files from a folder, a specific directory, or even an entire disk. To select files, simply drag and drop them into the Sequoia window or use the “Add Files” button to import them.
Once you’ve selected your files, you can choose to rename them all at once or rename them in batches. To rename them all at once, simply click the “Rename” button. To rename them in batches, you can use the “Batch Rename” feature, which allows you to apply different renaming rules to different groups of files.
Customizing Renaming Rules
Sequoia offers a variety of renaming rules that you can use to customize the names of your files. Here are some of the most popular renaming rules:
- File Name: Rename files based on their current name.
- Extension: Rename files by changing their file extension.
- Date: Rename files based on their creation or modification date.
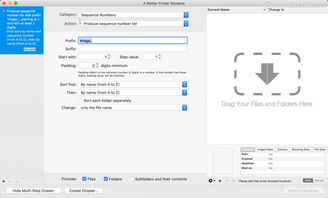
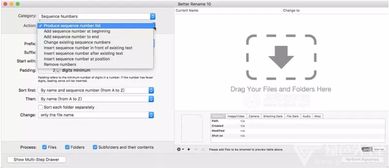
- Numbering: Add or remove numbering from file names.
- Regular Expressions: Use regular expressions to create complex renaming patterns.
Each renaming rule can be customized to suit your needs. For example, you can choose to add a prefix or suffix to file names, change the case of the file name, or even remove certain characters from the file name.
Applying Renaming Rules
Once you’ve selected your renaming rules, you can apply them to your files. To do this, simply click the “Apply” button in Sequoia. The application will then rename your files according to the rules you’ve set.
It’s important to note that you can undo any renaming changes you make with Sequoia. If you’re not happy with the results, you can simply click the “Undo” button to revert to the original file names.
Advanced Features
In addition to the basic renaming rules, Sequoia also offers a variety of advanced features that can help you manage your files more effectively. Here are some of the most notable features:
- Preview: Before applying any renaming rules, you can preview the changes to see how your files will be renamed.
- Backup: Sequoia can create a backup of your original files before renaming them, so you can easily revert to the original names if needed.
- Custom Templates: Create custom renaming templates to quickly apply common renaming patterns.
- Regular Expressions: Use regular expressions to create complex renaming patterns that can’t be achieved with basic renaming rules.
Conclusion
Sequoia is a powerful and versatile file renaming tool that can help you manage your files more effectively on your Mac. With its wide range of features and user-friendly interface, it’s an essential tool for anyone who needs to rename files in bulk. Whether you


