
Understanding the Importance of Recovering Replaced Files on Mac
Have you ever accidentally replaced a file on your Mac and wished you could undo the action? Losing important documents, photos, or other files can be a frustrating experience, but there are ways to recover replaced files on Mac. In this detailed guide, we will explore various methods and tools to help you retrieve your lost data.
Why is File Recovery Important?

When you replace a file on your Mac, it can be challenging to retrieve the original version, especially if you don’t have a backup. However, there are several reasons why file recovery is crucial:
-
Preventing Data Loss: Recovering replaced files ensures that you don’t lose valuable information permanently.
-
Restoring Original Versions: Sometimes, the replaced file may have been corrupted or modified, and recovering the original version is essential to maintain data integrity.
-
Time and Effort Savings: Instead of starting over or searching for alternative solutions, file recovery allows you to quickly restore your files and continue your work.
Methods to Recover Replaced Files on Mac
There are several methods you can use to recover replaced files on your Mac. Let’s explore some of the most effective ones:
1. Time Machine Backup
Time Machine is a built-in backup feature on Mac that automatically saves copies of your files at regular intervals. To recover a replaced file using Time Machine, follow these steps:
-
Open Time Machine by clicking on the Time Machine icon in the menu bar or by opening the Time Machine preference pane.
-
Use the timeline on the right side of the window to navigate to the date when the file was last backed up.
-
Locate the replaced file in the Finder window and click on it to preview its contents.
-
Click on the “Restore” button to save the file back to its original location.
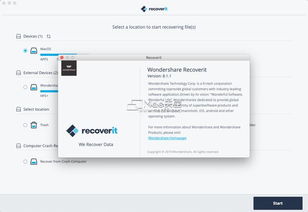
2. Using Third-Party File Recovery Software
There are several third-party file recovery tools available for Mac that can help you recover replaced files. Some popular options include:
| Software | Description |
|---|---|
| Recuva | Recuva is a free file recovery tool that supports various file formats and can recover files from deleted partitions, USB drives, and other storage devices. |
| Stellar Data Recovery | Stellar Data Recovery is a comprehensive tool that offers advanced features for recovering lost, deleted, or corrupted files from Mac and Windows systems. |
| EaseUS Data Recovery Wizard for Mac | EaseUS Data Recovery Wizard for Mac is a user-friendly tool that can recover files from various storage devices, including Mac hard drives, USB drives, and memory cards. |
Here’s how to use EaseUS Data Recovery Wizard for Mac to recover replaced files:
-
Download and install EaseUS Data Recovery Wizard for Mac from the official website.
-
Launch the application and select the location where the replaced file was stored.
-
Click on the “Scan” button to start the scanning process.
-
Once the scan is complete, navigate through the recovered files and select the replaced file you want to restore.
-
Click on the “Recover” button to save the file back to its original location or a new location of your choice.
3. Check the Trash
Before diving into more complex recovery methods, it’s essential to check the Trash folder on your Mac. Sometimes, replaced files may still be present in the Trash. To recover a file from the Trash:
-
Open the Trash folder by clicking on it in the Finder sidebar.
-
Locate the replaced file in the Trash.
-
Right-click on the file and select “Put Back” to restore it to its original location.


