Transforming DAZ File to Blender without DAZ Studio: A Comprehensive Guide
Are you looking to import DAZ files into Blender without using DAZ Studio? You’ve come to the right place. This guide will walk you through the process step by step, ensuring a seamless transition from DAZ to Blender. Whether you’re a seasoned 3D artist or just starting out, this guide will help you navigate the intricacies of working with DAZ files in Blender.
Understanding DAZ Files

DAZ files are a popular format used in the 3D industry, particularly for character creation and animation. These files contain detailed character models, clothing, and accessories, making them a favorite among artists and designers. However, DAZ files are typically designed to be used with DAZ Studio, which can be a limitation for those who prefer Blender.
Why Use Blender?

Blender is a free and open-source 3D creation suite that offers a wide range of features for modeling, rigging, animation, and rendering. It’s a versatile tool that can handle various types of projects, from simple character animations to complex architectural visualizations. By learning how to import DAZ files into Blender, you can take advantage of Blender’s powerful features without the need for DAZ Studio.
Required Software and Plugins

Before you begin, ensure you have the following software and plugins installed:
| Software | Version |
|---|---|
| Blender | 2.80 or later |
| DAZ Importer for Blender | Latest version |
Step-by-Step Guide to Importing DAZ Files into Blender
Now that you have the necessary software and plugins, let’s dive into the process of importing DAZ files into Blender:
-
Open Blender and create a new project.
-
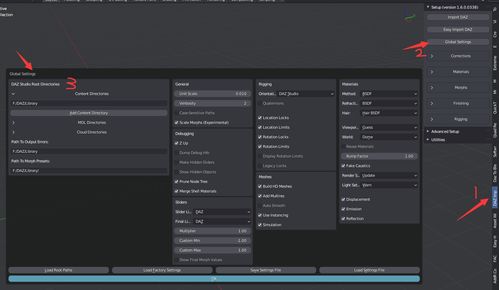
Install the DAZ Importer for Blender plugin by navigating to the “File” menu, selecting “User Preferences,” and then clicking on the “Add-ons” tab. Search for “DAZ Importer” and enable it.
-
Open the DAZ file you want to import. You can do this by clicking on the “File” menu, selecting “Import,” and then choosing “DAZ File.” Browse for the file and click “Import.”
-
Once the file is imported, you’ll see a list of items in the “Outliner.” These items represent the different components of your DAZ file, such as characters, clothing, and accessories.
-
Click on the item you want to work with in the “Outliner.” You can then manipulate the item by using the transform tools in the 3D viewport. For example, you can scale, rotate, and position the character as needed.
-
Apply any necessary materials and textures to your DAZ file. You can do this by selecting the item, navigating to the “Properties” panel, and then clicking on the “Material” tab. Here, you can assign a material to the item and adjust its properties.
-
Once you’re satisfied with the appearance of your DAZ file, you can proceed with rigging, animation, and rendering. Blender offers a wide range of tools and features to help you achieve your desired results.
Common Challenges and Solutions
While importing DAZ files into Blender is generally straightforward, you may encounter some challenges along the way. Here are some common issues and their solutions:
-
Problems with Materials and Textures: If you notice that the materials and textures are not applying correctly, try adjusting the settings in the “Material” tab of the “Properties” panel. Ensure that the material is assigned to the item and that the texture is properly mapped.
-
Missing Geometry: If certain parts of your DAZ file are missing geometry, it may be due to the import settings. Try adjusting the settings in the “Import” dialog box to ensure that all components are imported correctly.
-
Animation Issues: If you encounter animation issues, such as incorrect


