
Windows Unhide Files: A Comprehensive Guide
Have you ever found yourself in a situation where you can’t see certain files on your Windows computer? Maybe they’ve been hidden by mistake or due to a system setting. Don’t worry; you’re not alone. This guide will walk you through the process of unhide files on Windows, providing you with multiple methods to restore visibility to your files. Let’s dive in!
Understanding Hidden Files

Before we proceed, it’s important to understand what hidden files are. Hidden files are files that are not visible in the file explorer by default. This is often done to protect sensitive data or to keep the file system organized. However, it can be quite frustrating when you can’t find the files you need.
There are two types of hidden files:
- System Hidden: These files are hidden by the operating system and are usually not accessible to the user. They are essential for the proper functioning of the system.
- User Hidden: These files are hidden by the user or due to a system setting. They can be accessed and unhidden by the user.
Method 1: Using File Explorer
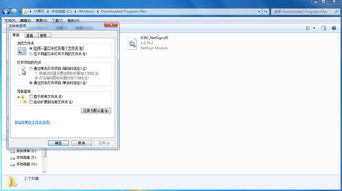
One of the simplest ways to unhide files on Windows is by using the File Explorer. Here’s how you can do it:
- Open File Explorer by clicking on the folder icon on the taskbar or by pressing the Windows key + E.
- In the top-right corner, click on the “View” tab.
- Look for the “Hidden items” checkbox under the “Show/hide” section. Check it to unhide hidden files.
- Close the File Explorer and refresh the folder to see the hidden files.
Method 2: Using Command Prompt

Another method to unhide files on Windows is by using the Command Prompt. This method is more advanced and requires some knowledge of the command line. Here’s how you can do it:
- Press the Windows key + R to open the Run dialog box.
- Type “cmd” and press Enter to open the Command Prompt.
- In the Command Prompt, navigate to the directory where the hidden files are located. For example, if the files are in the “Documents” folder, type “cd Documents” and press Enter.
- Once you’re in the correct directory, type the following command and press Enter: “attrib -h -r -s .”. This command will unhide all files in the directory.
- Close the Command Prompt and refresh the folder to see the hidden files.
Method 3: Using PowerShell
PowerShell is a powerful scripting language that can be used to unhide files on Windows. Here’s how you can do it:
- Press the Windows key + X and select “Windows PowerShell (Admin)” from the list.
- In the PowerShell window, type the following command and press Enter: “Get-ChildItem -Path ‘C:YourDirectory’ -Recurse | Where-Object { $_.Attributes -match ‘Hidden’ } | Select-Object -ExpandProperty Name”. Replace “C:YourDirectory” with the path to the directory where the hidden files are located.
- The command will list all hidden files in the directory. To unhide them, type the following command and press Enter: “Get-ChildItem -Path ‘C:YourDirectory’ -Recurse | Where-Object { $_.Attributes -match ‘Hidden’ } | Remove-Item -Force”. Again, replace “C:YourDirectory” with the path to the directory.
- Close the PowerShell window and refresh the folder to see the hidden files.
Method 4: Using Third-Party Software
There are several third-party software tools available that can help you unhide files on Windows. Some popular options include:
| Software | Description |
|---|---|
| Unhide Pro | Unhide Pro is a powerful tool that can unhide files, folders, and drives. It also allows you to search for hidden files and restore their original names. |


