
How to Encrypt Excel File: A Comprehensive Guide
Encrypting an Excel file is a crucial step to protect sensitive data from unauthorized access. Whether you’re sharing files with colleagues, storing them on cloud services, or simply keeping them safe on your computer, encryption ensures that your information remains secure. In this detailed guide, we’ll walk you through the process of encrypting an Excel file from start to finish, covering various methods and tools available to you.
Using Excel’s Built-in Encryption

Microsoft Excel offers a built-in feature that allows you to encrypt your files with a password. Here’s how to do it:
- Open your Excel file.
- Go to the “File” menu and select “Save As.” Choose a location to save your file and click “Save.”
- In the “Save As” dialog box, click on the “Tools” button and select “General Options.” This will open a new window.
- In the “General Options” window, check the “Password to open” box and enter a strong password. Click “OK.” You’ll be prompted to re-enter the password to confirm.
- Click “OK” again to save the file. Your Excel file is now encrypted and can only be opened with the password you set.
Keep in mind that this method only encrypts the file itself, not the data within it. If someone gains access to the file, they can still view the contents unless you also apply encryption to the cells containing sensitive information.
Encrypting Specific Cells or Ranges
For added security, you can encrypt specific cells or ranges within your Excel file. Here’s how to do it:
- Select the cells or ranges you want to encrypt.
- Right-click on the selected area and choose “Format Cells.” In the “Format Cells” dialog box, go to the “Protection” tab.
- Check the “Locked” box to prevent users from modifying the selected cells. Click “OK.” Your cells are now locked.
- Go to the “Review” tab in the Excel ribbon and click “Protect Sheet.” Enter a password and click “OK.” This will protect the entire sheet, including the locked cells.
Remember to save your file after applying these changes. With this method, even if someone has access to the file, they won’t be able to view or modify the encrypted cells without the password.
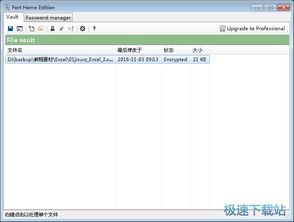
Using Third-Party Encryption Tools
While Excel’s built-in encryption is useful, it may not be sufficient for highly sensitive data. In such cases, you can use third-party encryption tools to enhance your file’s security. Here are a few popular options:
| Tool | Description | Price |
|---|---|---|
| WinRAR | Compress and encrypt files using a password. Can be used with Excel files. | Free for non-commercial use; paid versions available. |
| 7-Zip | Free and open-source file archiver with encryption capabilities. Can be used with Excel files. | Free |
| Advanced Excel Password Recovery | Recover lost or forgotten passwords for encrypted Excel files. | Varies by version and features |
These tools offer additional encryption methods and features that can help protect your Excel files even better. Be sure to research and choose a tool that meets your specific needs and requirements.
Storing Encrypted Files Securely
Encrypting your Excel files is just one part of the process. It’s also essential to store them securely to prevent unauthorized access. Here are some tips for storing encrypted files:
- Use a secure cloud storage service with encryption features, such as Google Drive, Dropbox, or OneDrive.
- Keep your passwords safe by using a password manager. This will help you avoid using weak or easily guessable passwords.
- Regularly update your passwords and use a unique password for each account.
- Backup your encrypted files to an external hard drive or USB flash drive. Store the backup in


