
Core FTP Upload File: A Comprehensive Guide for Efficient File Transfer
Are you looking to upload files using Core FTP? If so, you’ve come to the right place. In this detailed guide, I’ll walk you through the entire process of using Core FTP to upload files. Whether you’re a beginner or an experienced user, this article will provide you with all the information you need to ensure a smooth and efficient file transfer.
Understanding Core FTP

Core FTP is a popular FTP (File Transfer Protocol) client that allows users to transfer files between their local computer and a remote server. It supports various protocols, including FTP, FTPS, SFTP, and FTP-SSL, making it a versatile choice for file transfer needs.
System Requirements
Before you start using Core FTP, make sure your system meets the following requirements:
| Operating System | Minimum Requirements |
|---|---|
| Windows | Windows 7 or later |
| Mac OS | Mac OS X 10.7 or later |
| Linux | Any distribution with a graphical user interface |
Downloading and Installing Core FTP
Visit the Core FTP website (https://www.coreftp.com/) to download the latest version of Core FTP. The download is free, but you can also purchase a license for additional features. Once the download is complete, follow these steps to install Core FTP:
- Double-click the downloaded file to start the installation process.
- Follow the on-screen instructions to install Core FTP.
- After installation, launch Core FTP and you’re ready to start uploading files.
Connecting to a Server
Before you can upload files, you need to connect to a server. Here’s how to do it:
- In Core FTP, click on the “Quick Connect” button or go to “File” > “Quick Connect” from the menu.
- In the “Quick Connect” dialog box, enter the following information:
- Hostname: The domain name or IP address of the server.
- Port: The port number for the FTP protocol (usually 21 for FTP, 990 for FTPS, 22 for SFTP, and 21 for FTP-SSL).
- Username: Your username for the server.
- Password: Your password for the server.
- Click “Connect” to establish a connection to the server.
Uploading Files
Once you’re connected to the server, you can start uploading files. Here’s how to do it:
- In the “Local Site” pane, navigate to the folder containing the files you want to upload.
- In the “Remote Site” pane, navigate to the folder where you want to upload the files.
- Drag and drop the files from the “Local Site” pane to the “Remote Site” pane. You can also right-click on a file and select “Upload” to upload it individually.
- Wait for the upload process to complete. You’ll see a progress bar indicating the upload status.
Advanced Features
Core FTP offers several advanced features that can enhance your file transfer experience:
- File Synchronization: Automatically synchronize files between your local computer and the server.
- Batch Upload: Upload multiple files at once.
- File Manager: A built-in file manager that allows you to manage files on the server.
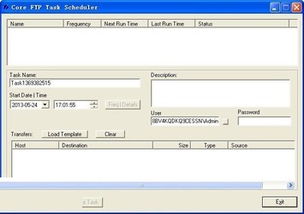
- Scripting: Use scripts to automate file transfer tasks.
Conclusion
Using Core FTP to upload files is a straightforward process that can be mastered with a bit of practice. By following this comprehensive guide, you should now be able to efficiently transfer files between your local computer and a remote server. Happy uploading!


