
See Hidden Files on Mac: A Comprehensive Guide
Have you ever wondered how to view hidden files on your Mac? Whether you’re a tech-savvy user or just looking to uncover some of the mysteries of your computer, this guide will walk you through the process step by step. Let’s dive in!
Why Would You Want to See Hidden Files?

Hidden files on your Mac can contain important system files, configuration settings, and other critical data. Some users might want to access these files for troubleshooting, customization, or simply out of curiosity. Here are a few reasons why you might want to see hidden files:
- Accessing system files for troubleshooting
- Modifying configuration settings for customization
- Curiosity about the inner workings of your Mac
How to See Hidden Files on Mac

There are several methods to view hidden files on your Mac. We’ll discuss the most common ones below:
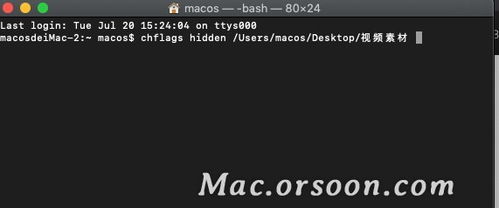
Method 1: Using the Terminal
The Terminal is a powerful command-line tool that allows you to access hidden files and directories. Here’s how to do it:
- Open the Terminal application. You can find it in the /Applications/Utilities/ folder.
- Enter the following command:
defaults write com.apple.finder AppleShowAllFiles YES - Press Enter and wait for the command to execute.
- Restart your Mac for the changes to take effect.
Now, when you navigate to your home directory or any other folder, you should see hidden files and directories displayed.
Method 2: Using the Finder Preferences
This method is a bit less technical and doesn’t require using the Terminal. Here’s how to do it:
- Open the Finder application.
- Go to the menu bar and click on “Finder” > “Preferences” > “Advanced”.
- Check the box next to “Show hidden files and folders” in the Advanced tab.
- Click “OK” to save the changes.
After applying these changes, hidden files and folders should be visible in your Finder.
Method 3: Using a Third-Party Application
There are several third-party applications available that can help you view hidden files on your Mac. Some popular options include:
These applications provide a user-friendly interface for managing hidden files and folders on your Mac.
How to Hide Files Again
Once you’ve viewed the hidden files and directories, you might want to hide them again. Here’s how to do it using the same methods mentioned above:
Using the Terminal
- Open the Terminal application.
- Enter the following command:
defaults write com.apple.finder AppleShowAllFiles NO - Press Enter and wait for the command to execute.
- Restart your Mac for the changes to take effect.
Using the Finder Preferences
- Open the Finder application.
- Go to the menu bar and click on “Finder” > “Preferences” > “Advanced”.
- Uncheck the box next to “Show hidden files and folders” in the Advanced tab.
- Click “OK” to save the changes.
After applying these changes, hidden files and directories should be hidden again.
Conclusion
Viewing hidden files on your Mac can be a useful skill, whether you’re troubleshooting, customizing your system, or simply satisfying your curiosity. By following the methods outlined in this guide, you should now be able to see and manage hidden files and directories on your Mac with ease.
|
|
|---|


