
3D Printing Files: A Comprehensive Guide for Aspiring Creators
Are you intrigued by the world of 3D printing and looking to dive into the realm of creating your own designs? If so, understanding the intricacies of 3D printing files is crucial. These files serve as the blueprint for your 3D printer, guiding it through the process of bringing your ideas to life. Let’s explore the various aspects of 3D printing files, from their creation to their usage.
Understanding 3D Printing Files

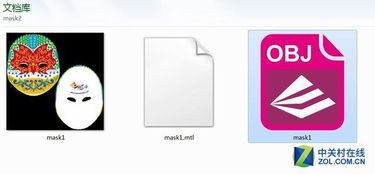
3D printing files are digital representations of objects, typically in the form of a mesh or a series of polygons. These files contain all the necessary information for a 3D printer to know how to build the object layer by layer. The most common file formats for 3D printing include STL (STereoLithography), OBJ (Object), and FBX (FilmBox).
STL files are the most widely used format in the 3D printing industry. They are simple and straightforward, making them easy to work with. OBJ files, on the other hand, are more versatile and can be used for various applications, including animation and video games. FBX files are primarily used in the entertainment industry and are compatible with a wide range of software.
Creating 3D Printing Files
Creating 3D printing files can be done using various software tools, ranging from simple CAD (Computer-Aided Design) programs to advanced 3D modeling software. Here’s a brief overview of the process:
-
Choose a 3D modeling software: There are numerous options available, such as Tinkercad, Fusion 360, and Blender. The choice depends on your skill level and the complexity of the object you want to create.
-
Design your object: Use the software’s tools to create your design. This may involve sketching, sculpting, or assembling pre-made components.
-
Export the file: Once your design is complete, export it as a 3D printing file in the desired format (STL, OBJ, or FBX).
-
Optimize the file: Ensure that the file is suitable for 3D printing by checking for errors, removing unnecessary details, and adjusting the layer height.
Using 3D Printing Files
Once you have a 3D printing file, you can use it to create physical objects using a 3D printer. Here’s a step-by-step guide on how to use 3D printing files:
-
Prepare the printer: Make sure your 3D printer is properly calibrated and loaded with the appropriate filament.
-
Import the file: Use your printer’s software to import the 3D printing file.
-
Set up the print settings: Adjust the print settings, such as the layer height, print speed, and infill percentage, to achieve the desired quality and print time.
-
Start the print: Once everything is set up, start the print process, and let your 3D printer do its magic.
Common Challenges and Solutions
While 3D printing is a fascinating technology, it’s not without its challenges. Here are some common issues and their solutions:
| Challenge | Solution |
|---|---|
| Print failures due to filament issues | Ensure the filament is of good quality and properly loaded into the printer. Check for any signs of damage or contamination. |
| Layer adhesion problems | Adjust the bed temperature and use adhesives or rafts to improve adhesion. Ensure the bed is clean and properly leveled. |
| Print quality issues | Optimize the print settings, such as the layer height and infill percentage. Check for errors in the 3D printing file and consider using a higher-quality filament. |
Conclusion
3D printing files are the backbone of the 3D printing process, allowing you to create unique and personalized objects. By understanding the creation and usage of these files, you can unlock the full


