
Edit OAC Files in GTA 5: A Comprehensive Guide
Are you a GTA 5 enthusiast looking to tweak and enhance your gaming experience? Editing OAC files, or Open Architecture files, can be a game-changer for your gameplay. In this detailed guide, I’ll walk you through the process of editing OAC files in GTA 5, covering everything from the basics to advanced techniques. Let’s dive in!
Understanding OAC Files

OAC files are the backbone of the game’s open-world architecture. They define the layout of the game’s maps, including roads, buildings, and other environmental features. By editing these files, you can modify the game’s environment, create custom maps, and even add new features.
Before you start editing, it’s important to have a basic understanding of the file structure. OAC files are typically stored in the “data” folder within the GTA 5 installation directory. You’ll need a program like OpenIV to access and modify these files.
Accessing OAC Files with OpenIV

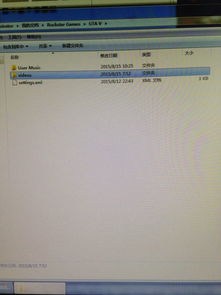
OpenIV is a popular modding tool for GTA 5 that allows you to edit OAC files and other game files. To get started, download and install OpenIV from the official website. Once installed, launch the program and navigate to the “GTA V” tab.
Click on “Open Game” and select your GTA 5 installation directory. OpenIV will automatically detect the game’s files and display them in the interface. Look for the “data” folder and expand it to find the OAC files you want to edit.
Editing OAC Files
Now that you have access to the OAC files, it’s time to start editing. OpenIV provides a variety of tools and features to help you modify the game’s environment. Here are some key points to keep in mind:
- Modifying Maps: You can change the layout of existing maps, add new roads, buildings, and other features, or even create entirely new maps from scratch.
- Customizing Environments: Modify the appearance of the game’s environment by changing textures, colors, and other visual elements.
- Adding New Features: With the right tools and knowledge, you can add new features to the game, such as custom vehicles, weapons, and more.
When editing OAC files, it’s important to save your work frequently and back up the original files in case you need to revert to the default settings. Additionally, be sure to test your modifications in-game to ensure they work as intended.
Advanced Techniques
For those looking to take their modding skills to the next level, there are several advanced techniques you can use to edit OAC files in GTA 5:
- Scripting: Learn how to use scripting languages like Lua to create custom gameplay mechanics and features.
- 3D Modeling: Use 3D modeling software to create custom models for vehicles, buildings, and other game elements.
- Texture Editing: Modify textures using image editing software to change the appearance of the game’s environment.
These advanced techniques require a solid understanding of the game’s file structure and the tools used to edit them. However, with practice and patience, you can create truly unique and impressive modifications for GTA 5.
Common Challenges and Solutions
Editing OAC files in GTA 5 can be a complex process, and you may encounter several challenges along the way. Here are some common issues and their solutions:
| Challenge | Solution |
|---|---|
| Modifications not appearing in-game | Ensure that the file paths are correct and that the modifications are compatible with your game version. |
| Game crashes or errors | Check for conflicting mods or outdated files. Try reverting to a previous save or backup to resolve the issue. |
| Difficulty in finding specific OAC files | Use online resources and forums to search for the specific files you need. Many experienced modders share their knowledge and resources online. |
Conclusion


