
Edit Screenshot File Type on Mac: A Comprehensive Guide
Editing screenshots on a Mac can be a straightforward process, but it’s important to understand the different file types and the tools at your disposal. Whether you’re a professional graphic designer or just someone who needs to make quick edits to a screenshot, this guide will walk you through the process of editing screenshot file types on your Mac.
Understanding Screenshot File Types

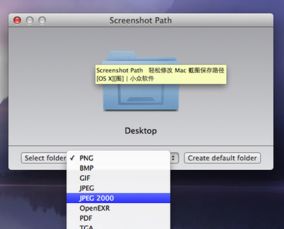
Before diving into the editing process, it’s crucial to understand the different file types associated with screenshots on a Mac. The most common file types include PNG, JPG, and GIF. Each has its own unique characteristics and use cases.
| File Type | Description | Use Case |
|---|---|---|
| PNG | Portable Network Graphics | High-quality images with transparent backgrounds |
| JPG | Joint Photographic Experts Group | Good for photographs and images with gradients |
| GIF | Graphics Interchange Format | Simple animations and images with limited color palettes |
Understanding the differences between these file types will help you choose the right format for your specific needs.
Editing Screenshot File Types with Preview

One of the most convenient ways to edit screenshot file types on a Mac is by using the built-in Preview app. Here’s how to get started:
- Open the screenshot you want to edit in Preview.
- Use the selection tool to select the area you want to edit.
- With the selection tool still active, click on the “Edit” menu and choose “Copy” or “Cut” to remove the unwanted part.
- Go to the “Edit” menu again and choose “Paste” to insert the copied or cut area into a new location.
- Use the “Crop” tool to trim any excess edges.
- Adjust the image’s brightness, contrast, and saturation using the “Adjust” menu.
- Save your changes by clicking on the “File” menu and choosing “Save As.” Select the desired file type and format.
Preview is a great tool for quick edits, but it may not offer the advanced features you need for more complex tasks.
Advanced Editing with Third-Party Software
For more advanced editing, you may want to consider using third-party software. Here are some popular options:
- Adobe Photoshop: The industry-standard for image editing, Photoshop offers a wide range of tools and features for editing screenshot file types.
- Adobe Lightroom: Ideal for editing photographs and screenshots with a focus on color correction and retouching.
- Affinity Photo: A cost-effective alternative to Photoshop, offering many of the same features and tools.
- Pixelmator Pro: A user-friendly, yet powerful image editor that’s great for both beginners and professionals.
Each of these programs has its own unique set of features and tools, so it’s important to choose the one that best suits your needs.
Converting Screenshot File Types
At times, you may need to convert your screenshot file type to a different format. Here’s how to do it:
- Open the screenshot in Preview.
- Click on the “File” menu and choose “Export As.” Select the desired file type from the dropdown menu.
- Choose a location to save the converted file and click “Save.”
Alternatively, you can use online conversion tools or third-party software to convert your screenshot file types.
Conclusion
Editing screenshot file types on a Mac can be a simple and straightforward process, whether you’re using the built-in Preview app or a third-party software. By understanding the different file types and the tools at your disposal, you can easily edit and convert your screenshots to meet your specific needs.


