
How to Import PST File to Gmail on an iMac: A Detailed Guide
Importing a PST file to Gmail on your iMac can be a game-changer for managing your emails, especially if you’re transitioning from Outlook or another email client. This guide will walk you through the process step by step, ensuring a smooth transition.
Understanding PST Files

PST (Personal Storage Table) files are commonly used by Microsoft Outlook to store emails, contacts, calendars, and other data. These files can be quite large and are not directly compatible with Gmail, which uses a different file format.
Preparation
Before you begin, make sure you have the following:
- Your PST file saved on your iMac.
- A Gmail account.
- Microsoft Outlook installed on your iMac (if you haven’t already used it to export your PST file).
Exporting PST File from Outlook
1. Open Outlook on your iMac.
2. Click on “File” in the top-left corner.
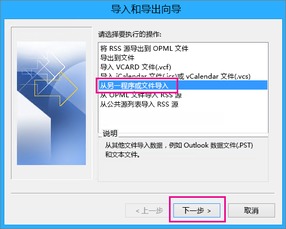
3. Select “Open & Export” and then “Import/Export…”
4. Choose “Export to a file” and click “Next.”
5. Select “Outlook Data File (.pst)” and click “Next.”
6. Browse to the location where your PST file is saved, select it, and click “Next.”
7. Choose the folders you want to export and click “Next.”
8. Select the location where you want to save the exported file and click “Finish.”
Using a Third-Party Tool
While the above method works, it can be time-consuming and may not include all your data. A more efficient way is to use a third-party tool like “PST to Gmail Converter.” Here’s how to do it:
- Download and install the “PST to Gmail Converter” on your iMac.
- Open the tool and click on “Add PST File.” Select your PST file and click “Open.”
- Select the Gmail account you want to import the data to.
- Choose the folders you want to import and click “Convert.”
Importing PST File to Gmail
1. Log in to your Gmail account on your iMac.
2. Click on the gear icon in the top-right corner and select “See all settings.”
3. Go to the “Accounts and Import” tab.
4. Click on “Import mail and contacts” and then “Add a mail account.”
5. Enter your email address and password for the Outlook account.
6. Select “Import emails from my other account (POP3).” Click “Next.”
7. Enter the incoming and outgoing server settings for your Outlook account. You can find these settings in your Outlook account settings.
8. Choose the folders you want to import and click “Start import.”
Verifying the Import
After the import process is complete, verify that your emails, contacts, and other data have been successfully imported to Gmail. You can do this by checking your Gmail account and ensuring that all the folders and data are present.
Conclusion
Importing a PST file to Gmail on your iMac can be a straightforward process, especially with the help of third-party tools. By following the steps outlined in this guide, you can ensure a smooth transition and have all your important data readily accessible in Gmail.


