
Using Amplify with AWS: How to Delete Files
Managing files in a cloud environment can be a complex task, especially when you’re using AWS Amplify. Amplify is a powerful service that allows you to build scalable, secure, and responsive mobile applications. One of the common operations you might need to perform is deleting files. In this article, I’ll guide you through the process of deleting files using Amplify with AWS, providing you with a detailed and multi-dimensional introduction.
Understanding Amplify Storage

Before we dive into the deletion process, it’s essential to understand how Amplify Storage works. Amplify Storage is a service that allows you to store and retrieve files in the cloud. It integrates with Amazon S3 (Simple Storage Service), which is a highly durable and available object storage service.
When you use Amplify Storage, you can upload files to a bucket in your S3 account. These files can then be accessed and manipulated through the Amplify API. To delete a file, you need to know the file’s key, which is a unique identifier for the file in the bucket.
Setting Up Your Environment
Before you can delete files using Amplify, you need to set up your environment. This involves creating an AWS account, setting up an Amplify project, and configuring your storage bucket.
1. Create an AWS Account:
- Go to the AWS Management Console and sign up for an account if you don’t already have one.
- Verify your email address and complete the sign-up process.
2. Set Up an Amplify Project:
- Install the Amplify CLI (Command Line Interface) on your computer.
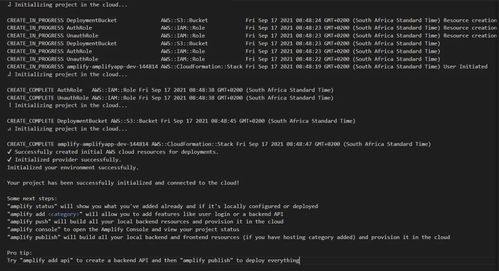
- Run the following command to create a new Amplify project:
amplify init- Follow the prompts to set up your project.
3. Configure Your Storage Bucket:
- Run the following command to add a storage bucket to your Amplify project:
amplify add storage- Follow the prompts to configure your bucket, including setting the bucket name and region.
Deleting Files Using Amplify

Now that you have your environment set up, you can start deleting files using Amplify. To delete a file, you need to know its key. You can obtain the key by accessing the file through the Amplify API or by using the Amplify Console.
1. Access the File’s Key:
- Go to the Amplify Console and navigate to the Storage section.
- Find the file you want to delete and note its key.
2. Delete the File:
- Run the following command to delete the file:
amplify storage delete -k your-file-key- Replace “your-file-key” with the actual key of the file you want to delete.
3. Verify the Deletion:
- After running the delete command, the file should be removed from your storage bucket.
- You can verify the deletion by checking the contents of the bucket in the AWS Management Console.
Handling Errors
When deleting files using Amplify, you may encounter errors. Here are some common errors and their possible causes:
| Error | Causes |
|---|---|
| Access Denied | You do not have the necessary permissions to delete the file. |
| File Not Found | The file you are trying to delete does not exist in the bucket. |
| Internal Server Error | There is an issue with the Amplify service or your AWS account. |
Addressing these errors may involve checking your permissions, verifying the file’s key, or contacting AWS support.
Conclusion
Deleting files using Amplify with AWS is a straightforward process once you have your environment set up. By following the steps outlined


