
3D Print Files: A Comprehensive Guide for Aspiring Creators
Are you fascinated by the world of 3D printing and eager to dive into the realm of creating your own designs? Look no further! In this detailed guide, we will explore everything you need to know about 3D print files, from their creation to their usage. Whether you are a beginner or an experienced user, this article will provide you with valuable insights and tips to enhance your 3D printing journey.
Understanding 3D Print Files

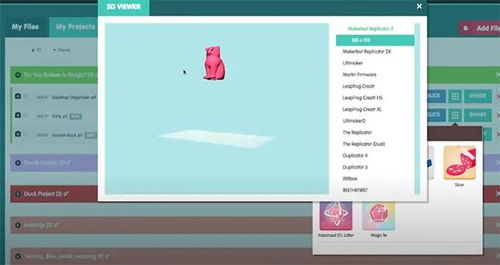
Before we delve into the intricacies of 3D print files, it’s essential to understand what they are. A 3D print file, also known as a STL (STereoLithography) file, is a digital representation of a 3D object. It contains a series of coordinates that define the shape, size, and structure of the object. These files are used by 3D printers to create physical objects layer by layer.
3D print files can be created using various software applications, such as Tinkercad, Fusion 360, and Blender. These programs allow users to design and modify 3D models, which can then be exported as STL files for printing.
Creating 3D Print Files
Creating your own 3D print files can be an exciting and rewarding experience. Here’s a step-by-step guide to help you get started:
-
Choose a 3D modeling software: As mentioned earlier, there are several software options available, each with its unique features and capabilities. Select a program that suits your skill level and design requirements.
-
Design your model: Use the software’s tools to create your 3D model. This can involve sculpting, modeling, or combining existing objects.
-
Export as STL: Once your design is complete, export it as an STL file. Ensure that the file is properly scaled and oriented for printing.
-
Check for errors: Use a 3D print file checker to identify any potential issues, such as holes, overlapping faces, or non-manifold edges.
-
Optimize for printing: Adjust the design parameters, such as layer height, infill density, and support structures, to optimize the print quality and reduce printing time.
Using 3D Print Files
Once you have your 3D print files, the next step is to prepare them for printing. Here’s a brief overview of the process:
-
Prepare your printer: Ensure that your 3D printer is properly calibrated and loaded with the appropriate filament.
-
Import the STL file: Use your printer’s software to import the STL file and set the desired print parameters.
-
Prepare the build plate: Clean and level the build plate to ensure a smooth and even print.
-
Start the print: Initiate the print process and let the printer do its magic.
Common File Formats and Software
Several file formats and software applications are commonly used in the 3D printing industry. Here’s a brief overview:
| File Format | Description | Software |
|---|---|---|
| STL | Standard file format for 3D printing | Tinkercad, Fusion 360, Blender |
| OBJ | Text-based file format for 3D models | Blender, Meshmixer |
| PLY | File format for storing 3D geometric data | Meshmixer, Netfabb |
| AMF | File format for additive manufacturing | Ultimaker Cura, Slic3r |
Best Practices for 3D Print Files
Creating and using 3D print files can be challenging, but following these best practices can help you achieve better results


