
Using GitHub Actions to Pipe Info to a File: A Detailed Guide for You
Managing and automating tasks in the software development lifecycle can be a daunting task. However, with GitHub Actions, you can streamline your workflow and make your life easier. One of the powerful features of GitHub Actions is the ability to pipe information to a file. In this article, I will walk you through the process of using GitHub Actions to pipe info to a file, covering various aspects such as setting up the workflow, using actions, and troubleshooting common issues.
Setting Up Your GitHub Repository

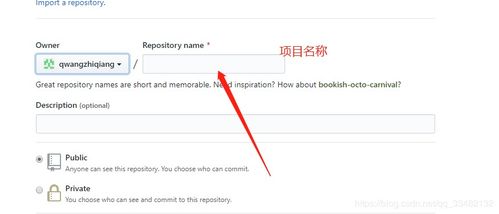
Before you start using GitHub Actions, you need to have a GitHub repository. If you don’t have one, you can create a new repository by visiting the GitHub website and clicking on the “New repository” button. Once you have a repository, you can proceed to set up your GitHub Actions workflow.
Creating a GitHub Actions Workflow
GitHub Actions workflows are defined using YAML files. To create a new workflow, you need to create a new file in your repository named `.github/workflows/your-workflow-name.yml`. This file will contain the configuration for your workflow.
Here’s an example of a basic workflow that pipes information to a file:
name: Info to Fileon: [push]jobs: info-pipe: runs-on: ubuntu-latest steps: - name: Checkout code uses: actions/checkout@v2 - name: Set up Node.js uses: actions/setup-node@v2 with: node-version: '14' - name: Run script run: echo "This is some info" > info.txtIn this example, the workflow is triggered on every push to the repository. It checks out the code, sets up Node.js, and then runs a script that writes some information to a file named `info.txt` in the repository.
Using GitHub Actions to Pipe Info to a File
Now that you have a basic workflow, let’s dive deeper into the steps involved in piping information to a file.
Step 1: Checkout Code
The first step in the workflow is to check out the code from the repository. This is done using the `actions/checkout@v2` action. This action ensures that the code is available in the workflow environment for subsequent steps.
Step 2: Set Up Dependencies
In many cases, you may need to set up dependencies or tools before you can run your script. In the example above, we used the `actions/setup-node@v2` action to set up Node.js. You can use similar actions to set up other tools or languages, such as `actions/setup-python@v2` for Python or `actions/setup-go@v2` for Go.
Step 3: Run Your Script
The final step is to run your script that pipes information to a file. In the example, we used the `echo` command to write some information to `info.txt`. You can use any command or script that you need to generate the information you want to pipe to the file.
Common Issues and Troubleshooting
While using GitHub Actions to pipe information to a file, you may encounter some common issues. Here are a few tips to help you troubleshoot them:
| Issue | Solution |
|---|---|
| File not being created | Check if the script is being executed correctly. Ensure that the file path is correct and that the necessary permissions are set. |
| Information not being written to the file | Verify that the script is generating the correct output. You can use commands like `cat` or `less` to view the output of the script. |
| Workflow not running | Ensure that the workflow file is correctly formatted and that the trigger conditions are set up properly. Check the GitHub Actions logs for any errors or warnings. |
By following these tips, you should be able to resolve most of the common issues you may encounter while using GitHub Actions to pipe information to a file.
Conclusion
Using GitHub Actions to pipe information to a file can be a powerful way to automate tasks and streamline


