
Import Serilog Files to Seq: A Comprehensive Guide
Are you looking to import Serilog files into Seq for better log management and analysis? If so, you’ve come to the right place. In this detailed guide, I’ll walk you through the process step by step, ensuring you have a seamless experience. Let’s dive in!
Understanding Serilog and Seq

Serilog is an open-source logging library for .NET applications, designed to be fast, reliable, and flexible. It allows developers to log events, errors, and other information from their applications. Seq, on the other hand, is a powerful log management and analytics platform that helps you visualize and analyze your logs in real-time.
By importing Serilog files into Seq, you can take advantage of Seq’s features, such as real-time search, alerting, and visualization, to gain deeper insights into your application’s performance and health.
Prerequisites
Before you begin, make sure you have the following prerequisites in place:
- Serilog installed in your .NET application
- Seq server running and accessible
- Seq client library installed in your application
Step-by-Step Guide to Importing Serilog Files into Seq
Now that you have everything set up, let’s go through the process of importing Serilog files into Seq.
Step 1: Configure Serilog to Output to Seq
First, you need to configure Serilog to output logs to Seq. To do this, add the following code to your application’s configuration:
Log.Logger = new LoggerConfiguration() .WriteTo.Seq("http://yourseqserver:5341") .CreateLogger();Replace “http://yourseqserver:5341” with the actual URL of your Seq server. This configuration will send logs to Seq in real-time.
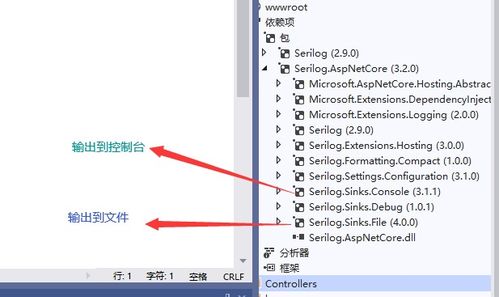
Step 2: Install Seq Client Library
Next, install the Seq client library in your application. You can do this by adding the following NuGet package to your project:
Install-Package Seq.ClientThis library provides a convenient way to interact with the Seq API and manage your logs.
Step 3: Create a Seq Connection
Now that you have the Seq client library installed, you need to create a connection to your Seq server. To do this, add the following code to your application’s configuration:
var seqConnection = new SeqConnection("http://yourseqserver:5341", "yourusername", "yourpassword");Replace “http://yourseqserver:5341” with the actual URL of your Seq server, and “yourusername” and “yourpassword” with your Seq credentials.
Step 4: Import Serilog Files into Seq
With the Seq connection established, you can now import Serilog files into Seq. To do this, use the following code:
var files = Directory.GetFiles("path/to/your/logs", ".log");foreach (var file in files){ var logEvents = SerilogReader.ReadEventsFromFile(file); seqConnection.Append(logEvents);}Replace “path/to/your/logs” with the actual path to your Serilog files. This code will read the Serilog files and send their contents to Seq.
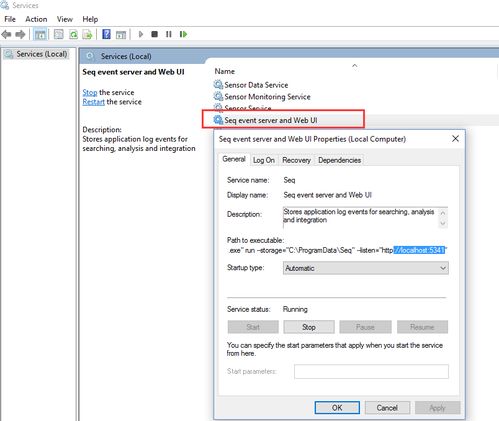
Step 5: Verify the Import
After importing the Serilog files, it’s essential to verify that the data has been successfully imported into Seq. You can do this by navigating to the Seq server and checking the logs. If everything looks good, you’re all set!
Additional Tips
Here are some additional tips to help you get the most out of importing Serilog files into Seq:
- Use Seq’s filtering and search capabilities to quickly find the information you need.
- Set up alerts to notify you of critical issues in real-time.
- Utilize Seq’s visualization tools to gain deeper insights into your application’s performance.
By following this guide, you should now have a good understanding of how to import Serilog files into Seq. Happy logging!


