
Open Melodyne 3 Files with Melodyne 5 Plugin on Mac: A Detailed Guide
Are you a music producer or audio engineer looking to enhance your workflow by opening Melodyne 3 files with the Melodyne 5 plugin on your Mac? You’ve come to the right place. This comprehensive guide will walk you through the process step by step, ensuring a seamless integration into your music production setup.
Understanding Melodyne 3 and Melodyne 5

Melodyne is a powerful audio software that allows users to edit and correct pitch and timing of audio recordings with precision. Melodyne 3 and Melodyne 5 are two versions of this software, each offering unique features and improvements over the previous one.
Melodyne 3 is known for its user-friendly interface and intuitive workflow, making it a popular choice for beginners and professionals alike. On the other hand, Melodyne 5 introduces a range of new features, such as a more advanced pitch correction algorithm, improved time-stretching capabilities, and enhanced audio-to-MIDI conversion.
System Requirements
Before you begin, ensure that your Mac meets the minimum system requirements for running Melodyne 5. Here’s a quick overview:
| Component | Minimum Requirement |
|---|---|
| Operating System | macOS 10.13 or later |
| Processor | Intel Core i5 or later |
| Memory | 8 GB RAM |
| Storage | 10 GB of available disk space |
Opening Melodyne 3 Files with Melodyne 5 Plugin
Now that you have a basic understanding of Melodyne 3 and Melodyne 5, let’s dive into the process of opening Melodyne 3 files with the Melodyne 5 plugin on your Mac.
Step 1: Install Melodyne 5
First, download and install Melodyne 5 from the Avid website. Follow the on-screen instructions to complete the installation process.
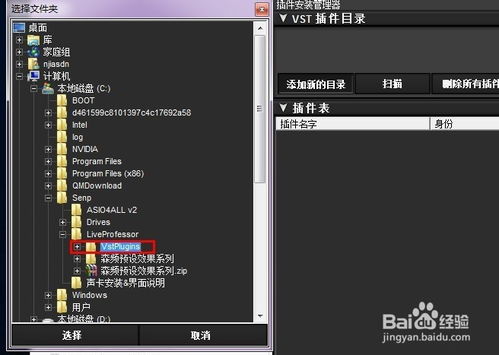
Step 2: Install the Melodyne 5 Plugin
Next, download the Melodyne 5 plugin for your preferred DAW (Digital Audio Workstation). Once downloaded, follow the instructions provided by the plugin manufacturer to install it into your DAW.
Step 3: Open Your DAW
Launch your DAW and create a new project or open an existing one. Ensure that your audio tracks are properly imported and arranged.
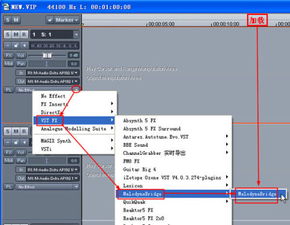
Step 4: Insert the Melodyne 5 Plugin
Select the audio track you want to process with Melodyne 5. Right-click on the track and choose “Insert Plugin” or a similar option. From the list of available plugins, select the Melodyne 5 plugin.
Step 5: Load the Melodyne 3 File
With the Melodyne 5 plugin inserted, you should see a new window appear. In this window, click on the “Open” button and navigate to the location where your Melodyne 3 file is saved. Select the file and click “Open” to load it into the plugin.
Step 6: Process the Audio
Once the Melodyne 3 file is loaded, you can start processing the audio. Use the various tools and features provided by Melodyne 5 to adjust pitch, timing, and other parameters as needed.
Step 7: Save and Export
After you’ve made the desired adjustments, save the project and export the processed audio back to your DAW. You can now continue working on your project or export the audio for use in other applications.
Conclusion
Opening Melodyne 3 files with the Melodyne 5 plugin on your Mac is a straightforward process that can greatly enhance your music production workflow. By following the steps outlined in this guide, you’ll be able to take full advantage of the powerful features offered by both Melodyne 3 and Melodyne 5.


