
Unlocking the Power of Helm Charts: Mastering the Use of Templates in YAML Files
Are you looking to enhance your Kubernetes deployment process with Helm charts? If so, you’ve come to the right place. Helm charts are a powerful tool for managing Kubernetes applications, and one of their most versatile features is the use of templates in YAML files. In this comprehensive guide, I’ll walk you through the ins and outs of using templates in Helm charts, providing you with the knowledge to streamline your deployment process and take your Kubernetes applications to the next level.
Understanding Helm Charts

Helm is a package manager for Kubernetes, allowing you to package, configure, and deploy applications on Kubernetes clusters. Helm charts are the building blocks of Helm, representing a Kubernetes application and its configuration. They consist of a set of files that define the application’s structure, configuration, and deployment process.
The Role of Templates in Helm Charts
Templates are the heart of Helm charts, providing the ability to generate Kubernetes manifests dynamically. These manifests are written in a templating language, typically Go templating, and are used to create Kubernetes resources such as Deployments, Services, and ConfigMaps. By using templates, you can define your application’s configuration in a single, reusable file, making it easier to manage and deploy.
Using Templates in YAML Files

Now that we understand the role of templates in Helm charts, let’s dive into how to use them in YAML files. Below are some key points to keep in mind:
-
Templates are stored in a directory named
templateswithin your Helm chart. -
Each template file should have a
.yamlor.tplextension. -
Templates can be written in Go templating language, which provides a rich set of functions and directives for generating Kubernetes manifests.
-
Variables can be defined in the Helm chart’s
values.yamlfile and used within templates to customize the generated manifests.
Example: Creating a Deployment Template
Let’s take a look at an example of a deployment template in a Helm chart. Suppose we have a simple web application that we want to deploy on Kubernetes. We can create a deployment template using the following YAML file:
--- apiVersion: apps/v1 kind: Deployment metadata: name: {{ .Values.app.name }} spec: replicas: {{ .Values.app.replicas }} selector: matchLabels: app: {{ .Values.app.name }} template: metadata: labels: app: {{ .Values.app.name }} spec: containers: - name: {{ .Values.app.name }} image: {{ .Values.app.image }} ports: - containerPort: {{ .Values.app.port }}In this example, we define a deployment with a variable number of replicas, based on the value specified in the values.yaml file. The template uses Go templating syntax to insert the application name, number of replicas, container image, and port number into the deployment manifest.
Integrating Templates with Values
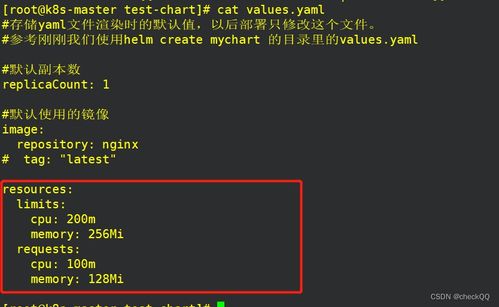
One of the most powerful aspects of Helm charts is the ability to use variables to customize the generated manifests. These variables are defined in the values.yaml file, which is located in the same directory as the templates. Here’s an example of a values.yaml file for our web application:
app: name: webapp replicas: 2 image: mywebapp:latest port: 80By using these variables in the template, we can easily customize the deployment manifest for different environments or configurations. For example, we can create a separate values-staging.yaml file for a staging environment, with different values for the application name, image, and port number.
Best Practices for Using Templates
When using templates in Helm charts, it’s important to follow best practices to ensure the reliability and maintainability of your charts. Here are some tips to keep in mind:
-
Keep your templates simple and focused on a single task.


