
Unprotect Excel File: A Comprehensive Guide for Users
Excel is a powerful tool for data management and analysis, but sometimes, the protection feature can hinder your workflow. Whether you need to access a protected workbook for collaboration or simply to view its contents, unprotecting an Excel file is a task that many users encounter. In this detailed guide, we will explore various methods to unprotect Excel files, ensuring that you can access the data you need without any hassle.
Understanding Excel File Protection

Before diving into the methods to unprotect an Excel file, it’s essential to understand the basics of file protection. Excel offers two types of protection: password protection and sheet protection. Password protection requires a password to open the workbook, while sheet protection restricts access to specific sheets or cells within the workbook.
Password protection is applied at the workbook level, and you need the password to unlock the file. Sheet protection, on the other hand, is applied to individual sheets and can be used to restrict editing, formatting, or inserting/deleting cells.
Method 1: Unprotecting with the Password
One of the simplest ways to unprotect an Excel file is by using the password provided by the file’s owner. Here’s how you can do it:
- Open the protected Excel file.
- When prompted for a password, enter the password provided by the file’s owner.
- Once the file is unlocked, you can make any changes you need.
Remember that if you don’t have the password, you won’t be able to access the file using this method. In such cases, you may need to explore other options.
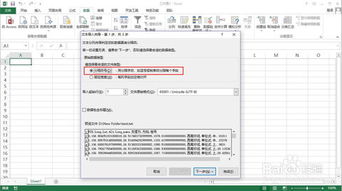
Method 2: Unprotecting without the Password
When you don’t have the password to unlock a protected Excel file, there are still several methods you can try. Here are some of the most common ones:
Method 2.1: Using the “Unprotect Workbook” Command
1. Open the protected Excel file.
2. Go to the “File” menu and select “Options” (or press “Alt + F + T”).
3. In the “Excel Options” dialog box, click on the “Trust Center” tab.
4. Click on “Trust Center Settings” in the left pane.
5. In the “Trust Center” settings, click on the “Trust Center Settings” button.
6. In the “Trust Center” settings dialog box, click on the “Protected View” tab.
7. Uncheck the “Enable Protected View for files that originate from the internet” option.
8. Click “OK” to close all the dialog boxes.
9. Go back to the Excel workbook and try to unprotect it using the “Unprotect Workbook” command.
Method 2.2: Using the “Unprotect Sheet” Command
1. Open the protected Excel file.
2. Right-click on the sheet you want to unprotect and select “Unprotect Sheet” from the context menu.
3. Enter the password if prompted.
4. Once the sheet is unlocked, you can make any changes you need.
Method 2.3: Using the “Unprotect Workbook” Command in the Developer Tab
1. Open the protected Excel file.
2. If the “Developer” tab is not visible in the ribbon, go to “File” > “Options” > “Customize Ribbon” and check the “Developer” checkbox.
3. Click on the “Developer” tab in the ribbon.
4. In the “Developer” tab, click on the “Unprotect Workbook” button.
5. Enter the password if prompted.
6. Once the workbook is unlocked, you can make any changes you need.
Method 3: Using Third-Party Software
When all else fails, you can use third-party software to unprotect Excel files. These tools are designed to bypass password protection and unlock files quickly. However, it’s essential to choose a reputable and reliable software to avoid any potential security risks.
Some popular third-party software options include:
| Software | Description |
|---|


