
Understanding the Raw Image File: A Comprehensive Guide
Have you ever wondered what a raw image file is and why it’s considered the gold standard in photography? In this detailed guide, we’ll delve into the intricacies of raw image files, exploring their benefits, how they’re created, and how to work with them effectively.
What is a Raw Image File?

A raw image file is an unprocessed image captured directly from a digital camera’s sensor. Unlike JPEG or TIFF files, which are compressed and processed by the camera’s internal algorithms, raw files contain all the data captured by the sensor, including exposure, color, and tonal information.
Why Use Raw Image Files?
There are several reasons why photographers and enthusiasts prefer working with raw image files:
-
Greater Control: Raw files offer more control over exposure, contrast, color, and sharpness during post-processing.
-
Non-Destructive Editing: Adjustments made to a raw file do not alter the original data, allowing for unlimited edits without quality loss.
-
Extended Dynamic Range: Raw files have a wider range of tones, enabling better recovery of details in both highlights and shadows.
-
Color Accuracy: Raw files provide more accurate color representation, allowing for precise color adjustments.
How are Raw Image Files Created?

When you take a photo with a digital camera, the sensor captures light and converts it into electrical signals. These signals are then processed by the camera’s internal algorithms to create a JPEG or TIFF file. In contrast, a raw file is simply the unprocessed data from the sensor, which is then saved to your camera’s memory card.
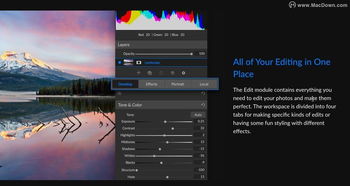
Working with Raw Image Files
Working with raw image files requires specialized software, such as Adobe Lightroom, Capture One, or even the camera’s own raw processing software. Here’s a brief overview of the process:
-
Import: Import your raw files into your preferred software.
-
Basic Adjustments: Make basic adjustments like exposure, contrast, and white balance.
-
Detail Enhancements: Adjust sharpness, noise reduction, and other details.
-
Color Correction: Adjust color, saturation, and hue to achieve the desired look.
-
Export: Export the processed image as a JPEG, TIFF, or another format suitable for your needs.
Raw File Formats
There are several raw file formats, each with its own advantages and limitations:
| Format | Description | Advantages | Disadvantages |
|---|---|---|---|
| Adobe DNG | Open-source raw file format | Interoperable across different camera brands and software | Not all cameras support DNG |
| Canon CR2/CR3 | Canon’s raw file format | High-quality image data | Only compatible with Canon cameras and software |
| Nikon NEF | Nikon’s raw file format | High-quality image data | Only compatible with Nikon cameras and software |
| Adobe LR Raw | Lightroom’s proprietary raw file format | Optimized for Lightroom’s processing engine | Not compatible with other software |
Raw File Size and Storage
Raw files are significantly larger than JPEG or TIFF files due to their uncompressed nature. For example, a 16-megapixel raw file can be anywhere from 20 to 30 MB, while a JPEG file of the same resolution might be only 5 to 10 MB. This means you’ll need more storage


