
Condense Picture File Size: A Comprehensive Guide
Reducing the file size of your images is a crucial skill in today’s digital age. Whether you’re a photographer, graphic designer, or simply someone who wants to share photos online, understanding how to condense picture file size can save you time, storage space, and bandwidth. In this article, we’ll explore various methods and tools to help you achieve smaller image file sizes without sacrificing quality.
Understanding Image File Sizes

Before diving into the techniques for condensing image file size, it’s essential to understand the factors that contribute to the overall file size. The primary factors include the image resolution, format, and compression level. Let’s take a closer look at each of these aspects.
| Factor | Description |
|---|---|
| Resolution | The number of pixels in an image, measured in width x height (e.g., 1920×1080 pixels). |
| Format | The file format in which the image is saved, such as JPEG, PNG, or GIF. |
| Compression | The process of reducing the file size by removing redundant data, which can affect image quality. |
Now that we have a basic understanding of the factors that influence image file size, let’s explore some methods to condense your images.
Optimizing Image Resolution
One of the most effective ways to reduce image file size is by adjusting the resolution. High-resolution images are great for printing and large displays, but they can be unnecessarily large for web use. Here’s how to optimize your image resolution:
- Identify the intended use of the image. If it’s for the web, a resolution of 72 pixels per inch (PPI) is typically sufficient.
- Open the image in an image editing software like Adobe Photoshop or GIMP.
- Go to the Image menu and select “Image Size.” In the dialog box, uncheck the “Resample Image” box to maintain the aspect ratio.
- Adjust the resolution to the desired PPI for web use.
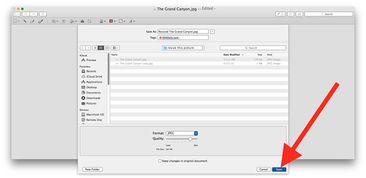
- Save the image in a compressed format like JPEG or PNG.
Choosing the Right Image Format
The image format you choose can significantly impact the file size. Here’s a brief overview of popular image formats and their typical use cases:
- JPEG: Widely used for web and print, JPEG is a lossy compression format that reduces file size by removing some image data. It’s ideal for photographs.
- PNG: A lossless compression format that maintains image quality while reducing file size. It’s suitable for graphics with transparency and text.
- GIF: A lossless compression format with a maximum resolution of 256 colors. It’s commonly used for simple animations and graphics.
When condensing image file size, consider the following:
- For photographs, JPEG is often the best choice due to its efficient compression.
- For graphics with transparency or text, PNG is a better option.
- For simple animations or graphics, GIF is the most suitable format.
Using Compression Tools
Compression tools can further reduce image file size without significantly affecting quality. Here are some popular tools you can use:
- ImageOptim: A free, open-source tool for Mac and Windows that automatically optimizes images by removing unnecessary metadata and compressing them.
- TinyPNG: An online tool that reduces the file size of PNG and JPEG images by up to 80% without visible quality loss.
- Optimizilla: A free, open-source tool for Windows that allows you to manually adjust compression settings for JPEG and PNG images.
When using compression tools, keep the following in mind:
- Experiment with different compression settings to find the balance between file size and quality.
- Always keep a backup of the original image before applying compression.


