
How to Convert a QuickTime File to MP4: A Detailed Guide
QuickTime files, with their .mov extension, are a popular format for storing video and audio content. However, if you find yourself needing to convert these files to the more widely supported MP4 format, you’re in luck. This guide will walk you through the process step by step, ensuring a smooth transition from QuickTime to MP4.
Why Convert QuickTime to MP4?

Before diving into the conversion process, it’s important to understand why you might want to convert your QuickTime files to MP4. Here are a few reasons:
- MP4 is a more universally compatible format, making it easier to share and play videos across different devices and platforms.
- MP4 files are generally smaller in size compared to QuickTime files, which can save storage space and reduce loading times.
- MP4 is an open standard, while QuickTime is a proprietary format owned by Apple, which means MP4 files are less likely to become obsolete in the future.
Choosing the Right Conversion Tool
There are several tools available for converting QuickTime files to MP4, each with its own set of features and capabilities. Here are a few popular options:
| Tool | Platform | Key Features |
|---|---|---|
| HandBrake | Windows, macOS, Linux | Free and open-source, supports a wide range of input and output formats, customizable settings |
| Any Video Converter | Windows | Supports over 100 input and output formats, batch conversion, built-in video editor |
| Adobe Media Encoder | Windows, macOS | Part of the Adobe Creative Cloud suite, integrates with other Adobe applications, offers advanced features |
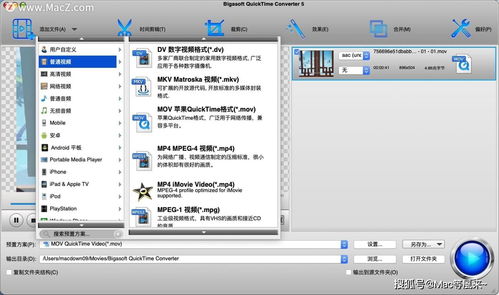
Converting QuickTime to MP4 with HandBrake
HandBrake is a popular, free, and open-source video transcoder that can handle QuickTime to MP4 conversions with ease. Here’s how to do it:
- Download and install HandBrake from the official website (handbrake.fr).
- Open HandBrake and click on the “Open Source” button to import your QuickTime file.
- Select “MP4” as the output format from the “Format” dropdown menu.
- Choose a preset that suits your needs, such as “Fast 1080p30” or “High Quality 1080p30.” You can also customize the settings manually if you prefer.
- Select the destination folder for your converted MP4 file.
- Click the “Start Encode” button to begin the conversion process.
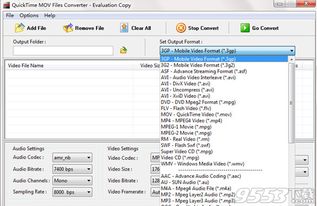
Converting QuickTime to MP4 with Any Video Converter
Any Video Converter is a versatile tool that can handle a wide range of video formats, including QuickTime to MP4 conversions. Here’s how to use it:
- Download and install Any Video Converter from the official website (anyvideoconverter.com).
- Open the program and click on the “Add Video” button to import your QuickTime file.
- Select “MP4” as the output format from the “Profile” dropdown menu.
- Choose a preset that suits your needs, or click on the “Customize” button to adjust the settings manually.
- Select the destination folder for your converted MP4 file.
- Click the “Convert Now” button to begin the conversion process.
Converting QuickTime to MP4 with Adobe Media Encoder
Adobe Media Encoder is a powerful tool that comes with the Adobe Creative Cloud suite. It can handle QuickTime to MP4 conversions, as well as other video formats. Here’s how to use it:
- Open your project in Adobe Premiere Pro, After Effects, or another Creative Cloud application.
- Go to the “File” menu and select “Export” > “Media Encoder.” This will open the


