
See Hidden Files on MacOS: A Comprehensive Guide
Managing files on your MacOS device can sometimes be a bit tricky, especially when you’re trying to access hidden files. Hidden files are files that are not visible in the Finder’s default view, and they can be crucial for system files or personal data that you might not want to be seen by everyone. In this guide, I’ll walk you through various methods to see hidden files on your MacOS device, ensuring that you have the knowledge to access them when needed.
Why Would You Want to See Hidden Files?

There are several reasons why you might want to see hidden files on your MacOS device:
-
System files: Some system files are hidden to prevent accidental modification or deletion.
-
Personal data: You might have sensitive personal data stored in hidden files that you want to access.
-
File management: Sometimes, you might need to manage hidden files for better organization.
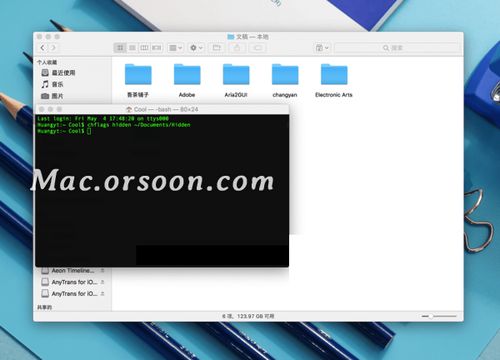
Method 1: Using the Terminal
The Terminal is a powerful tool that allows you to access hidden files on your MacOS device. Here’s how to do it:
-
Open the Terminal application. You can find it in the Applications > Utilities folder.
-
Enter the following command: `defaults write com.apple.finder AppleShowAllFiles YES`
-
Press Enter, and then close the Terminal.
-
Restart your computer for the changes to take effect.
Now, when you open Finder, you should see all hidden files and folders.
Method 2: Using the Finder Preferences
Another way to see hidden files on your MacOS device is by adjusting the Finder preferences:
-
Open Finder and click on the “Finder” menu at the top left corner of the screen.
-
Select “Preferences” from the dropdown menu.
-
Go to the “Advanced” tab.
-
Check the box next to “Show hidden files and folders.” This will make all hidden files and folders visible in Finder.
-
Click “OK” to save the changes.
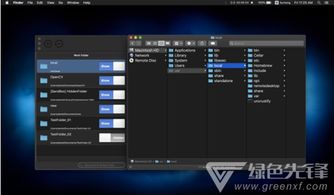
Method 3: Using a Third-Party Application
There are several third-party applications available that can help you see hidden files on your MacOS device. Some popular options include:
These applications provide a user-friendly interface for managing hidden files and folders on your MacOS device.
Method 4: Using the Command Line
For those who are comfortable with the command line, you can use the following command to see hidden files:
ls -aThis command will list all files and folders, including hidden ones, in the current directory.
Method 5: Using the Go Menu
Another quick way to see hidden files is by using the Go menu in Finder:
-
Open Finder and navigate to the folder where you want to see hidden files.
-
Press `Command + Shift + G` to open the “Go” menu.
-
Enter `.` (dot) in the “Go to Folder” field and press Enter.
This will take you to the root directory, where you can see all hidden files and folders.
Conclusion
Accessing hidden files on your MacOS device can be done in several ways, from using the Terminal to adjusting Finder preferences. Whether you need to manage system files, access personal data, or simply organize your files better, these methods will help you see hidden files on your MacOS device. Remember to


