
How to Format SSD Without Losing Files on It
Formatting an SSD can be a daunting task, especially when you’re worried about losing important files. However, with the right approach and tools, you can format your SSD without any data loss. In this guide, I’ll walk you through the process step by step.
Understanding SSD Formatting
 Before diving into the formatting process, it’s important to understand what formatting an SSD entails. Formatting an SSD essentially prepares the drive for use by creating a file system that the operating system can understand. This process can erase all data on the drive, so it’s crucial to back up any important files before proceeding.
Backup Your Files
 The first step in formatting your SSD without losing files is to back up all your important data. This can be done by copying files to an external hard drive, using cloud storage services, or creating a disk image of your SSD. Here’s how you can back up your files:
1. Identify the files you want to back up. This includes documents, photos, videos, and any other important data.
2. Copy the files to an external hard drive or use cloud storage services like Google Drive, Dropbox, or OneDrive.
3. Alternatively, you can create a disk image of your SSD using third-party software like Macrium Reflect or Acronis True Image.
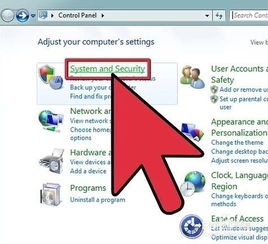
Choose the Right Formatting Tool
 Once you’ve backed up your files, the next step is to choose the right formatting tool. There are several options available, including built-in operating system tools and third-party software. Here’s a brief overview of some popular formatting tools:
| Tool | Description |
|---|---|
| Windows Disk Management | Windows’ built-in tool for managing and formatting drives. |
| macOS Disk Utility | macOS’ built-in tool for managing and formatting drives. |
| MiniTool Partition Wizard | Third-party software that offers advanced partitioning and formatting features. |
| EaseUS Partition Master | Another third-party software that provides partitioning and formatting capabilities. |
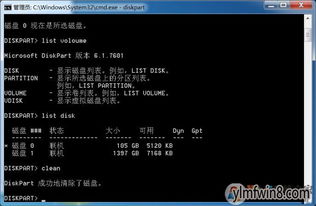
Formatting Your SSD
Now that you have your files backed up and the right formatting tool selected, it’s time to format your SSD. Here’s how to do it using Windows Disk Management:
1. Open Disk Management by searching for “Disk Management” in the Start menu.
2. Locate your SSD in the list of drives. It should be labeled as “Unallocated” or “Not Initialized” if it hasn’t been formatted.
3. Right-click on the SSD and select “New Simple Volume.” Follow the prompts to create a new volume and assign a drive letter.
4. Once the volume is created, right-click on it and select “Format.” Choose the desired file system (e.g., NTFS for Windows or APFS for macOS) and click “OK” to start the formatting process.
Verify Data Integrity
After formatting your SSD, it’s important to verify that your data has been backed up correctly. Here’s how you can do that:
1. Restore the files you backed up to your SSD.
2. Compare the restored files with the original files to ensure they are identical.
3. If everything looks good, you can now proceed with using your SSD without worrying about data loss.
Conclusion
Formatting an SSD without losing files is a straightforward process when you follow the right steps. By backing up your files, choosing the right formatting tool, and verifying data integrity, you can ensure that your SSD is formatted correctly without any data loss. Remember to always keep a backup of your important files, and you’ll be well-prepared for any future formatting needs.


