
Understanding the Windows Hosts File: A Detailed Guide for You
The Windows Hosts file is a crucial component of your computer’s operating system, serving as a local DNS server. It allows you to map hostnames to IP addresses without relying on external DNS servers. In this article, I will delve into the intricacies of the Windows Hosts file, providing you with a comprehensive understanding of its purpose, structure, and usage.
What is the Windows Hosts File?

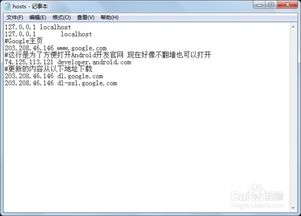
The Windows Hosts file is a plain text file that resides in the C:WindowsSystem32driversetc directory. It contains a list of IP addresses and corresponding hostnames. When you type a hostname into your web browser, the operating system checks the Hosts file first to see if it can find the IP address associated with that hostname. If it does, the browser will use that IP address to connect to the website. If not, the operating system will then query an external DNS server to resolve the hostname.
Why Use the Windows Hosts File?
There are several reasons why you might want to use the Windows Hosts file:
-
Speed up DNS resolution: By mapping hostnames to IP addresses locally, you can avoid the delay caused by querying external DNS servers.
-
Block unwanted websites: You can add entries to the Hosts file that map specific hostnames to the IP address of a local loopback (127.0.0.1), effectively blocking access to those websites.
-
Test websites: You can use the Hosts file to test websites without having to wait for DNS resolution or configure your network settings.
-
Customize your browsing experience: You can map hostnames to different IP addresses for various purposes, such as accessing different versions of a website or testing a new website design.
How to View and Edit the Windows Hosts File
Before you can edit the Windows Hosts file, you need to ensure that you have the necessary permissions. By default, the Hosts file is read-only for non-administrative users. To edit the file, follow these steps:
-
Open File Explorer and navigate to C:WindowsSystem32driversetc.
-
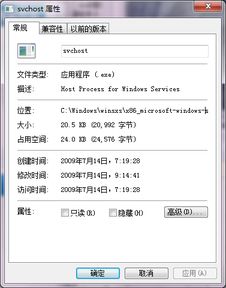
Right-click on the Hosts file and select “Properties.” In the “Security” tab, click on “Edit.” If prompted, enter your administrator password.
-
Click “OK” to open the Hosts file in Notepad or another text editor.
-
Make the necessary changes to the file and save it.
Understanding the Structure of the Windows Hosts File
The Windows Hosts file is structured as follows:
| Line | Content |
|---|---|
| 1 | 127.0.0.1 localhost |
| 2 | 127.0.0.1 localdomain |
| 3 | 127.0.0.1 loopback |
| 4 | … |
The first three lines are reserved for the loopback address (127.0.0.1), which is used for local connections. The remaining lines contain the mappings between hostnames and IP addresses. Each line consists of an IP address, a space, and a hostname. For example, the line “127.0.0.1 google.com” maps the hostname “google.com” to the IP address “127.0.0.1” (localhost).
Common Uses of the Windows Hosts File
Here are some common uses of the Windows Hosts file:
-
Blocking unwanted websites: You can add entries to the Hosts file that map specific hostnames to the IP address of a local loopback (127.0.0.1), effectively blocking access to those websites


