
Extract Tar File: A Comprehensive Guide for Users
Have you ever come across a tar file and wondered how to extract its contents? If so, you’re not alone. Tar files are a common format for archiving and distributing files, especially in Unix-like operating systems. In this article, I’ll walk you through the process of extracting tar files from start to finish, covering various methods and tools available for different platforms. Let’s dive in!
Understanding Tar Files

Before we get into the extraction process, it’s essential to understand what a tar file is. A tar file, short for tape archive, is a collection of files and directories bundled together into a single archive. It’s often used for backup purposes, distributing software, or organizing files for transfer. Tar files can be compressed using various algorithms, such as gzip, bzip2, or xz, to reduce their size and save storage space.
Here’s a quick overview of the most common tar file extensions:
| Extension | Description |
|---|---|
| .tar | Uncompressed tar file |
| .tar.gz | Compressed tar file using gzip |
| .tar.bz2 | Compressed tar file using bzip2 |
| .tar.xz | Compressed tar file using xz |
Extracting Tar Files on Windows
Windows users have a couple of options for extracting tar files. The most straightforward method is to use the built-in Windows Command Prompt or PowerShell. Here’s how to do it:
- Open Command Prompt or PowerShell.
- Navigate to the directory containing the tar file using the `cd` command.
- Use the `tar` command with the appropriate options to extract the file. For example:
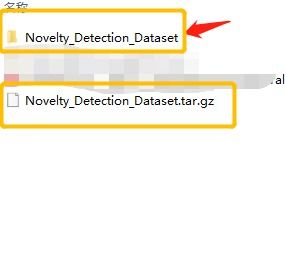
tar -xvf filename.tar.gz
This command will extract the contents of `filename.tar.gz` to the current directory. If you want to specify a different output directory, use the `-C` option followed by the path to the directory:
tar -xvf filename.tar.gz -C /path/to/output/directory
Alternatively, you can use third-party tools like 7-Zip or WinRAR, which offer a more user-friendly interface for extracting tar files.
Extracting Tar Files on macOS
macOS users can extract tar files using the Terminal or third-party applications. Here’s how to do it using the Terminal:
- Open Terminal from the Applications > Utilities folder.
- Navigate to the directory containing the tar file using the `cd` command.
- Use the `tar` command with the appropriate options to extract the file. For example:
tar -xvf filename.tar.gz
This command will extract the contents of `filename.tar.gz` to the current directory. If you want to specify a different output directory, use the `-C` option followed by the path to the directory:
tar -xvf filename.tar.gz -C /path/to/output/directory
macOS also comes with a built-in application called Archive Utility, which can be used to extract tar files. Simply right-click on the tar file and select “Open With” > “Archive Utility.” The contents will be extracted to the same directory as the tar file.
Extracting Tar Files on Linux
Linux users have the most options for extracting tar files, as the tar command is a standard utility in most Linux distributions. Here’s how to do it using the Terminal:
- Open Terminal.
- Navigate to the directory containing the tar file using the `cd` command.
- Use the `tar` command with the appropriate options to extract the file. For example:
tar -xvf filename.tar.gz
This command will extract the contents of `filename.tar.gz` to the current directory. If you want to specify a different output directory, use the `-C` option followed by the path to the directory:


