
Visual Code: Save a File – A Comprehensive Guide
Are you new to Visual Studio Code (VS Code) and looking to save your first file? Or perhaps you’re an experienced user seeking to optimize your file-saving process. Regardless of your level of expertise, this guide is tailored to provide you with a detailed, multi-dimensional introduction to saving files in VS Code.
Understanding the Basics

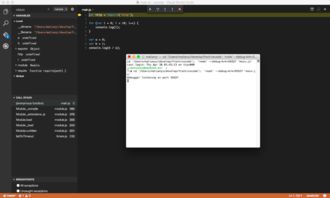
Before diving into the specifics of saving files in VS Code, it’s essential to understand the basic interface and functionality. VS Code is a versatile code editor developed by Microsoft, known for its customizable features and support for a wide range of programming languages.
When you first open VS Code, you’ll see a clean, intuitive interface. The main components include the editor, the status bar, and the sidebar. The editor is where you’ll write your code, the status bar displays information about your current file and workspace, and the sidebar allows you to navigate through your project’s files and folders.
Creating a New File

To create a new file in VS Code, you have several options:
- Click on the “File” menu and select “New File” or press
Ctrl+N(Windows/Linux) orCmd+N(macOS). - Right-click on the sidebar and choose “New File” from the context menu.
- Press
Ctrl+Shift+N(Windows/Linux) orCmd+Shift+N(macOS) to open a new file immediately.
Once you’ve created a new file, you can start typing your code. As you type, VS Code will automatically save your file at regular intervals, which is known as “auto-saving.” This feature helps prevent data loss in case of unexpected program crashes or power outages.
Manual File Saving
While auto-saving is convenient, there may be instances where you want to manually save your file. Here’s how you can do it:
- Click on the “File” menu and select “Save” or press
Ctrl+S(Windows/Linux) orCmd+S(macOS). - Right-click on the file in the sidebar and choose “Save” from the context menu.
When you save a file for the first time, VS Code will prompt you to specify the file name and location. You can choose any name and location you prefer. If you want to save the file in a specific directory, make sure to navigate to that directory before saving.
Using the Quick Access Menu
VS Code’s quick access menu is a powerful feature that allows you to perform various tasks, including saving files, with minimal effort. To access the quick access menu:
- Press
F1orCtrl+Shift+P(Windows/Linux) orCmd+Shift+P(macOS).
Once the quick access menu is open, type “Save” and press Enter. This will save your current file without prompting you for a file name or location.
Customizing Auto-Save Settings
By default, VS Code saves your files automatically every few seconds. However, you can customize this behavior to suit your preferences. To adjust the auto-save settings:
- Go to the “File” menu and select “Preferences” > “Settings” or press
Ctrl+,(Windows/Linux) orCmd+,(macOS). - Search for “Auto Save” in the search bar.
- Adjust the “Auto Save” settings to your liking.
Some common auto-save settings include:
| Setting | Description |
|---|---|
| Auto Save | Enables or disables auto-saving. |
| Auto Save On Focus Change |


