
Hide Home in File Explorer: A Comprehensive Guide
Are you tired of seeing the “Home” folder in your File Explorer every time you open it? Do you wish to customize your File Explorer experience by hiding certain folders? If yes, then you’ve come to the right place. In this article, I will guide you through the process of hiding the “Home” folder in File Explorer on Windows 10 and Windows 11. Let’s dive in!
Understanding the Home Folder

The “Home” folder is a special folder in Windows that contains your personal files, such as documents, pictures, music, and videos. It is usually located in the user’s profile directory and is accessible through the File Explorer. However, some users may find it cluttered or unnecessary, and thus, they want to hide it.
Method 1: Using File Explorer Options
One of the simplest ways to hide the “Home” folder in File Explorer is by using the File Explorer Options. Here’s how you can do it:
- Open File Explorer by clicking on the folder icon in the taskbar or by pressing the Windows key + E.
- In the top-right corner, click on the “View” tab.
- Look for the “Show/hide” section and click on it.
- Uncheck the “Home folder” option.
- Click “Apply” and then “OK” to save the changes.
This method is straightforward and doesn’t require any additional software or tools. However, it’s worth noting that this change will only affect the current user’s File Explorer settings. If you want to hide the “Home” folder for all users, you’ll need to use a different method.
Method 2: Editing the Registry
Another way to hide the “Home” folder in File Explorer is by editing the Windows Registry. This method is more advanced and requires caution, as incorrect changes to the registry can cause system instability. Here’s how you can do it:
- Press the Windows key + R to open the Run dialog box.
- Type “regedit” and press Enter to open the Registry Editor.
- Navigate to the following path: HKEY_CURRENT_USERSoftwareMicrosoftWindowsCurrentVersionExplorerAdvanced
- On the right side, find the “Hidden” value.
- Double-click on it and set its value data to “1” (without quotes) to hide the “Home” folder.
- Click “OK” and close the Registry Editor.
This method will hide the “Home” folder for all users. However, it’s important to note that making changes to the registry can be risky. If you’re not comfortable with editing the registry, it’s best to seek assistance from a professional.
Method 3: Using Group Policy Editor
Group Policy Editor is a powerful tool that allows you to configure various settings on your Windows system. To hide the “Home” folder using Group Policy Editor, follow these steps:
- Press the Windows key + R to open the Run dialog box.
- Type “gpedit.msc” and press Enter to open the Group Policy Editor.
- Navigate to the following path: User Configuration > Administrative Templates > Windows Components > File Explorer
- On the right side, find the “Remove Home folder from File Explorer” policy.
- Double-click on it and select “Enabled” to hide the “Home” folder.
- Click “OK” and close the Group Policy Editor.
This method is useful if you’re using a Windows domain or if you want to apply the setting to multiple computers. However, it’s important to note that Group Policy Editor is only available in Windows 10 Pro, Enterprise, and Education editions, as well as Windows 11 Pro and Enterprise editions.
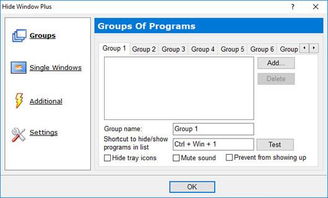
Method 4: Using a Third-Party Software
There are several third-party software tools available that can help you hide the “Home” folder in File Explorer. These tools are usually user-friendly and offer additional features, such as hiding other folders or customizing the File Explorer interface. Some popular options include:


