
Creating an .exe from Python Files in VS Code: A Detailed Guide for You
Are you a Python developer looking to distribute your applications as standalone .exe files? If so, you’ve come to the right place. In this comprehensive guide, I’ll walk you through the process of creating an .exe file from your Python scripts using Visual Studio Code (VS Code). Whether you’re a beginner or an experienced developer, this guide will provide you with the necessary steps and information to achieve your goal.
Why Create an .exe File from Python Scripts?

Creating an .exe file from your Python scripts offers several advantages:
-
Portability: Users can run your application on any Windows machine without installing Python.
-
Convenience: Users don’t need to worry about setting up Python environments or dependencies.
-
Professionalism: Distributing your application as an .exe file can give it a more polished and professional appearance.
Prerequisites
Before you begin, ensure you have the following prerequisites installed:
-
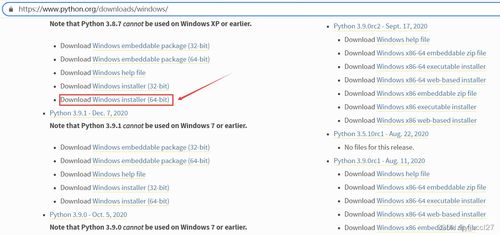
Visual Studio Code: Download and install the latest version from the official website.
-
Python: Install Python on your machine and note the installation path.
-
PyInstaller: Install PyInstaller by running the following command in your terminal or command prompt:
pip install pyinstallerCreating the .exe File
Now that you have the necessary prerequisites, let’s create the .exe file for your Python script.
Step 1: Open Your Python Script in VS Code
Open your Python script in VS Code. Make sure you have the Python extension installed to get syntax highlighting and other helpful features.
Step 2: Install PyInstaller in VS Code
With your script open, go to the Extensions view (View > Extensions) and search for “Python”. Install the “Python” extension if you haven’t already.
Step 3: Configure PyInstaller
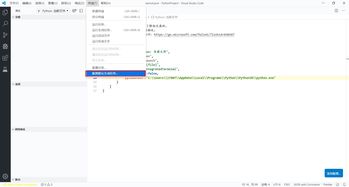
With the Python extension installed, go to the Command Palette (Ctrl+Shift+P or Cmd+Shift+P on macOS) and type “Python: Configure Interpreter”. Select the Python interpreter you installed earlier.
Step 4: Create the .exe File
Now that PyInstaller is configured, go to the Command Palette again and type “Python: Run PyInstaller”. This will open a new window where you can specify the options for creating the .exe file.
Here’s a breakdown of the options you can set:
-
OneFile: Generates a single executable file.
-
Exe: Generates a standalone executable file.
-
Console: Generates a console executable (useful for scripts that require user input).
-
Windowed: Generates a GUI executable (useful for scripts with graphical interfaces).
-
Additional Files: Adds additional files to the executable (e.g., images, fonts, etc.).
After setting the options, click “Run” to start the process. PyInstaller will analyze your script and generate the .exe file in the specified output directory.
Testing the .exe File
Once the .exe file is created, navigate to the output directory and run the file. If everything is set up correctly, your Python script should execute without any issues.
Additional Tips
Here are some additional tips to help you create an .exe file from your Python script:
-
Use a virtual environment: To avoid conflicts with other Python packages, create a virtual environment for your project and install PyInstaller within it.
-
Optimize your script: Before creating the .exe file, make sure your script is optimized for performance and memory usage.
-
Test on different machines: Test your .exe file on various Windows machines to ensure compatibility and stability.
Conclusion
Creating an .exe file


