
How to View Files on Blackmagic 4K on Windows: A Detailed Guide
Blackmagic 4K cameras have become a popular choice among videographers and filmmakers for their high-quality footage and versatility. If you’ve recently purchased a Blackmagic 4K camera or are considering one, you might be wondering how to view the files on your Windows computer. This guide will walk you through the process step by step, ensuring that you can easily access and view your 4K footage.
Understanding Blackmagic 4K File Formats

Before diving into the viewing process, it’s important to understand the file formats that Blackmagic 4K cameras use. The most common formats are:
| File Format | Description |
|---|---|
| RAW | Uncompressed, high-quality footage that captures every detail of the scene. |
| ProRes | Compressed format that offers a balance between quality and file size. |
| DNxHD | Another compressed format that is widely used in the broadcast industry. |
These formats are designed to provide the best possible quality for your footage, but they can also be more challenging to work with due to their large file sizes and specific requirements for viewing.
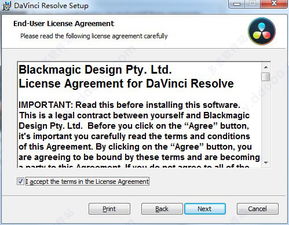
Step 1: Install Blackmagic DaVinci Resolve

Blackmagic DaVinci Resolve is a powerful video editing software that is also capable of viewing 4K footage. To view your Blackmagic 4K files on Windows, you’ll need to install DaVinci Resolve on your computer. Here’s how to do it:
- Visit the Blackmagic website and download the DaVinci Resolve installer for Windows.
- Run the installer and follow the on-screen instructions to install the software.
- Once the installation is complete, launch DaVinci Resolve.
DaVinci Resolve is a free download, but it also offers a paid version with additional features and capabilities.
Step 2: Import Your Blackmagic 4K Files
With DaVinci Resolve open, you can import your Blackmagic 4K files into the software. Here’s how to do it:
- Click on the “File” menu and select “Import Media.”
- Browse to the location of your Blackmagic 4K files and select the files you want to import.
- Click “Import” to add the files to your project.
DaVinci Resolve will automatically convert your 4K files to a format that is compatible with the software, allowing you to view them without any issues.
Step 3: View Your Blackmagic 4K Footage
Once your files are imported, you can view your Blackmagic 4K footage in DaVinci Resolve. Here’s how to do it:
- Click on the “Media Pool” on the left side of the interface.
- Locate the files you imported and double-click on them to open them in the viewer.
- Use the play button to start playing your footage.
DaVinci Resolve provides a variety of tools and features that allow you to view your footage in detail, including zoom, frame rate control, and more.
Step 4: Alternative Viewing Options
While DaVinci Resolve is a great option for viewing Blackmagic 4K footage, there are other software programs you can use as well. Here are a few alternatives:
- Adobe Premiere Pro: A popular video editing software that offers robust support for 4K footage.
- Final Cut Pro X: A professional video editing software that is known for its powerful 4K capabilities.
- Media Player Classic – Home Cinema: A free media player that supports a wide range of video formats, including 4K.
These programs may require additional settings or codecs to properly view 4K footage, so be sure to check the software’s documentation for instructions on how to do so.


