
Understanding Git Remove File: A Comprehensive Guide
Managing files in a Git repository is an essential skill for any developer. One of the most common operations is removing files from the repository. In this article, we will delve into the ‘git remove file’ command, exploring its various aspects, usage scenarios, and best practices.
What is the ‘git remove file’ command?

The ‘git remove file’ command is used to delete files from a Git repository. It can be used to remove files that are no longer needed or to clean up the repository. This command is particularly useful when you want to remove a file that has been modified or added to the repository by mistake.
How to use the ‘git remove file’ command
Using the ‘git remove file’ command is straightforward. Here’s a step-by-step guide on how to use it:
- Open your terminal or command prompt.
- Navigate to the directory containing the file you want to remove.
- Run the ‘git remove’ command followed by the file name. For example, to remove a file named ‘example.txt’, you would use the following command:
git remove example.txt
After running this command, Git will remove the file from the working directory. However, the file will still be present in the staging area and the repository. To permanently remove the file from the repository, you need to commit the changes.
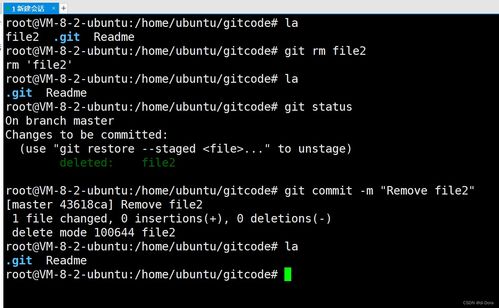
- Commit the changes using the ‘git commit’ command. For example:
git commit -m "Remove example.txt"
This will remove the file from the staging area and commit the changes to the repository. The file will no longer be present in the repository’s history.
Handling deleted files in the repository
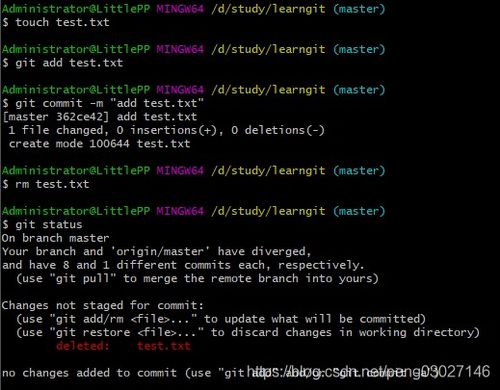
When you remove a file using the ‘git remove file’ command, Git will not delete the file from the repository’s history. This means that you can still view the file’s history and restore it if needed. Here’s how you can handle deleted files in the repository:
- Use the ‘git log’ command to view the commit history. This will show you the commit where the file was removed.
- Use the ‘git checkout’ command to restore the file from the specified commit. For example, to restore the file from the commit at ‘commit_hash’, you would use the following command:
git checkout commit_hash -- example.txt
This will restore the file from the specified commit and place it in the current working directory. You can then add the file to the staging area and commit the changes to the repository.
Best practices for using the ‘git remove file’ command
Here are some best practices to keep in mind when using the ‘git remove file’ command:
- Always double-check the file name before running the ‘git remove’ command. Deleting a file permanently can be irreversible.
- Use the ‘git rm –cached’ command to remove a file from the staging area without deleting it from the working directory.
- Before removing a file, ensure that you have backed up any important data.
- Use the ‘git log’ command to review the commit history before permanently deleting a file.
Comparing ‘git remove file’ with other file management commands
There are several other Git commands that can be used to manage files in a repository. Here’s a comparison of the ‘git remove file’ command with some of these commands:
| Command | Description |
|---|---|
| git rm | Removes a file from the working directory and the staging area. |
| git rm –cached | Removes a file from the staging area without deleting it from the working directory. |
| git mv | Renames a file in the working directory and the staging area. |
| git ls-files | Lists all files in the working directory and the staging area. |
While the ‘git


