
Using mp3tag to Organize Your Music Files and Folders
Managing a large collection of music files can be a daunting task, especially when it comes to organizing them into folders. mp3tag is a powerful tool that can help you streamline this process. In this article, I’ll guide you through the various features and functionalities of mp3tag to help you organize your music files and folders efficiently.
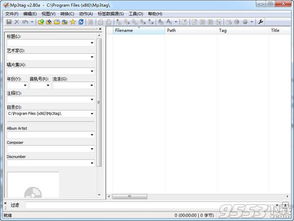
1. Overview of mp3tag

mp3tag is a versatile audio tag editor that supports a wide range of audio formats, including MP3, FLAC, WMA, and more. It allows you to edit metadata, rename files, and organize your music collection with ease.
2. Installing and Setting Up mp3tag

Before you can start organizing your music files, you need to download and install mp3tag from its official website. The installation process is straightforward, and you can choose to install additional language files if needed.
Once installed, you can open mp3tag and start by adding your music files to the library. You can do this by clicking on “File” > “Add Folder” and selecting the folder containing your music files. mp3tag will automatically scan the folder and add the files to the library.
3. Editing Metadata
One of the key features of mp3tag is its ability to edit metadata. Metadata includes information such as the artist, album, track number, and genre. This information is crucial for organizing your music collection effectively.
Here’s how you can edit metadata:
- Click on a file in the library to select it.
- Go to the “Tag” menu and choose the appropriate tag editor (e.g., “ID3v2.3” for MP3 files).
- Enter the desired metadata in the respective fields.
- Click “Save” to apply the changes.
4. Renaming Files
Renaming your music files can help you organize them more effectively. mp3tag allows you to rename files based on the metadata you’ve entered. Here’s how to do it:
- Select the files you want to rename.
- Go to the “File” menu and choose “Rename Files.” Alternatively, you can use the keyboard shortcut Ctrl+R.
- In the “Rename Files” dialog box, select the desired template from the “Template” dropdown menu. You can customize the template to include metadata such as the artist, album, and track number.
- Click “OK” to apply the changes.
5. Organizing Files into Folders
Once you’ve edited the metadata and renamed your files, you can organize them into folders. Here’s how to do it:
- Select the files you want to organize.
- Go to the “File” menu and choose “Move Files.” Alternatively, you can use the keyboard shortcut Ctrl+M.
- In the “Move Files” dialog box, select the destination folder where you want to move the files.
- Click “OK” to apply the changes.
6. Advanced Features
mp3tag offers several advanced features that can help you further organize your music collection:
- Tag Scanner: This feature allows you to scan your music collection for missing metadata and automatically fill in the missing information.
- Tag Editor: You can use this feature to edit metadata in bulk, saving you time when organizing a large collection.
- Tag Library: This feature allows you to search for and filter files based on metadata, making it easier to find specific tracks.
7. Tips and Tricks
Here are some tips and tricks to help you get the most out of mp3tag:
- Use the “Find” feature to search for specific metadata within your music collection.
- Customize the interface to suit your preferences by changing the theme and layout.
- Use the “Batch Conversion” feature to convert your music files to a different format if needed.
8. Conclusion
Organizing your music files and folders can be a time-consuming task, but with mp3tag, it becomes much easier. By using its powerful


