
Understanding and Reducing JPG File Size: A Comprehensive Guide for You
Are you tired of large JPG files that take up too much space on your device or slow down your website loading times? If so, you’ve come to the right place. In this detailed guide, I’ll walk you through various methods and tools to reduce JPG file size effectively. Whether you’re a photographer, graphic designer, or just someone looking to manage their digital files better, this article is tailored to help you out.
Why Reduce JPG File Size?

Before diving into the methods, let’s understand why reducing JPG file size is important. Larger files consume more storage space, take longer to upload and download, and can slow down your website’s performance. Here are a few reasons why you should consider reducing JPG file size:
- Save storage space on your device or server
- Improve website loading times
- Enhance email delivery speed
- Streamline file sharing processes
Understanding JPG File Format
JPG, also known as JPEG (Joint Photographic Experts Group), is a widely used image format that supports lossy compression. This means that when you reduce the file size, some quality is lost, but it’s often not noticeable to the naked eye. Understanding the basics of JPG file format will help you make informed decisions while reducing file size.
| Feature | Description |
|---|---|
| Lossy Compression | Reduces file size by removing some data, which can slightly degrade image quality |
| Color Depth | Number of colors an image can display; higher color depth results in better quality but larger file size |
| Resolution | Number of pixels in an image; higher resolution results in better quality but larger file size |
Methods to Reduce JPG File Size
Now that you understand the importance of reducing JPG file size and the basics of the file format, let’s explore various methods to achieve this goal.
1. Use Image Editing Software
Image editing software like Adobe Photoshop, GIMP, or Paint.NET allows you to adjust the quality and resolution of your JPG files. Here’s how to do it:
- Open your JPG file in the image editing software
- Go to the ‘File’ menu and select ‘Save As’ or ‘Export’
- In the ‘Save As’ or ‘Export’ dialog box, choose ‘JPEG’ as the file format
- Adjust the quality slider to reduce file size; lower quality results in smaller file size but lower image quality
- Save the file
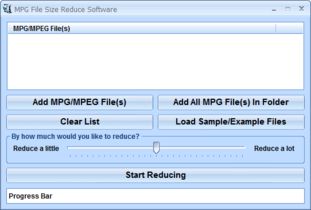
2. Use Online Tools
Online tools like TinyPNG, JPEGmini, or Compressor.io offer a quick and easy way to reduce JPG file size. Here’s how to use TinyPNG as an example:
- Visit the TinyPNG website (https://tinypng.com/)
- Upload your JPG file by clicking on the ‘Upload PNG’ button
- Wait for the tool to compress your file
- Download the compressed file
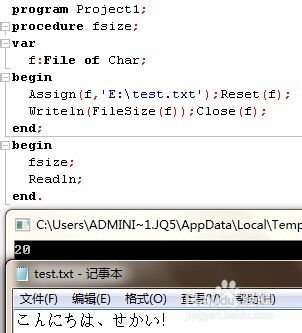
3. Use Command Line Tools
For advanced users, command line tools like ImageMagick can be used to reduce JPG file size. Here’s an example of how to use ImageMagick to resize and compress a JPG file:
convert input.jpg -resize 800x600 -quality 70 output.jpg
This command will resize the input.jpg file to 800×600 pixels and compress it to 70% quality, resulting in a smaller file size.
4. Optimize for Web
When optimizing JPG files for web use, it’s essential to balance file size and image quality. Here are a few tips:
- Use a web-friendly resolution, such as 1920×1080 or 1280×720
- Adjust the color depth to 8 bits per channel
- Use a quality setting between 60


