
Setting for Windows Templates to Open File Explorer Automatically
Are you tired of manually opening File Explorer every time you need to navigate through your files? Do you wish there was a way to streamline this process and make it more efficient? Look no further! In this comprehensive guide, I will walk you through the steps to set up Windows templates that automatically open File Explorer for you. Let’s dive in!
Understanding Windows Templates

Before we proceed, let’s understand what Windows templates are. Templates are pre-made files or folders that you can use as a starting point for creating new documents, presentations, or projects. They can be customized to suit your needs and can save you time by providing a consistent structure.
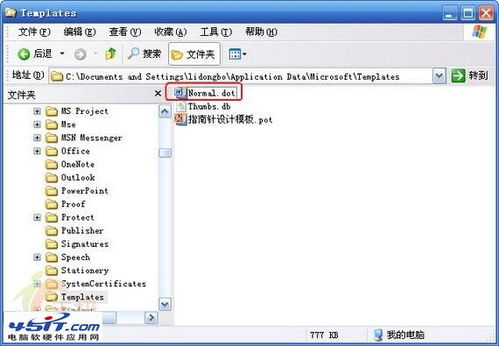
Windows templates are stored in a specific location on your computer, and you can access them by opening File Explorer and navigating to the following path:
| Path | Description |
|---|---|
| C:UsersYourUsernameAppDataRoamingMicrosoftWindowsTemplates | Contains all the templates for various applications and purposes. |
Now that we have a basic understanding of Windows templates, let’s move on to setting up File Explorer to open automatically.
Creating a Template for File Explorer

To create a template for File Explorer, you need to create a new folder and name it accordingly. Here’s how you can do it:
- Open File Explorer.
- Right-click on the desktop or any other location where you want to create the template.
- Select “New” > “Folder” from the context menu.
- Type a name for the folder, such as “File Explorer Template,” and press Enter.
Now that you have created the template folder, you can customize it to your liking. You can add shortcuts to frequently accessed folders, create a custom layout, or even add a background image.
Setting Up File Explorer to Open Automatically
Once you have your template ready, you can set up File Explorer to open automatically using the following steps:
- Right-click on the desktop or any other location where you want to create a shortcut.
- Select “New” > “Shortcut” from the context menu.
- In the “Type the location of the item” field, enter the following path:
C:WindowsSystem32explorer.exe /n, /e, /select, "C:UsersYourUsernameAppDataRoamingMicrosoftWindowsTemplatesFile Explorer Template"
Replace “YourUsername” with your actual username. This command will open File Explorer to the specified template folder.
- Click “Next” and give the shortcut a name, such as “File Explorer Template.” Click “Finish” to create the shortcut.
Now, whenever you double-click on the shortcut, File Explorer will open automatically to the template folder you created.
Customizing the Template
Once you have set up the template, you can customize it further to suit your needs. Here are some tips to help you get started:
- Organize your files: Create subfolders within the template folder to organize your files and make them easier to find.
- Set up shortcuts: Add shortcuts to frequently accessed folders or files within the template folder.
- Customize the layout: You can change the view, sort order, and other settings to make the template more user-friendly.
- Use templates: If you frequently create similar types of files, you can create additional templates within the main template folder.
By customizing your template, you can save time and effort when working with files and folders on your computer.
Conclusion
Setting up Windows templates to open File Explorer automatically can greatly enhance your productivity and make file management a breeze. By following the steps outlined in this guide, you can create a personalized template that suits your needs and streamline your file navigation process. Happy organizing!


