
Unlocking the Power of Word File Printing with the O365 Mobile App
Are you tired of the hassle of printing documents from your mobile device? Look no further! The O365 Mobile App offers a seamless and efficient solution for printing Word files directly from your smartphone or tablet. In this comprehensive guide, we will delve into the various aspects of using the O365 Mobile App for printing Word files, ensuring that you have all the information you need to make the most out of this feature.
Understanding the O365 Mobile App

The O365 Mobile App is a versatile tool designed to enhance productivity on the go. It provides access to a wide range of Microsoft Office applications, including Word, Excel, PowerPoint, and OneNote. With the O365 Mobile App, you can create, edit, and share documents from anywhere, at any time. One of the standout features of this app is its ability to print Word files directly from your mobile device.
Setting Up the O365 Mobile App
Before you can start printing Word files from the O365 Mobile App, you need to ensure that the app is properly set up on your device. Here’s a step-by-step guide to help you get started:
- Download and install the O365 Mobile App from your device’s app store.
- Open the app and sign in with your Microsoft account credentials.
- Grant the necessary permissions for the app to access your device’s storage and internet connection.
- Once you’re logged in, you should see a list of your OneDrive files. Navigate to the Word file you want to print.
Printing Word Files from the O365 Mobile App
Now that you have the O365 Mobile App set up, let’s explore how to print a Word file:
- Open the Word file you want to print by tapping on it.
- Once the file is open, tap on the three dots in the top-right corner of the screen to access the menu.
- Select “Print” from the menu options.
- The app will display a list of available printers. Choose the printer you want to use for printing your document.
- Adjust the print settings, such as the number of copies, page range, and orientation, as needed.
- Tap “Print” to start the printing process.
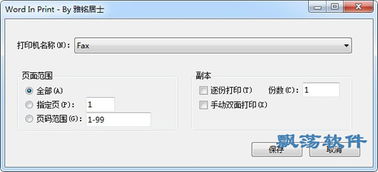
Customizing Print Settings
The O365 Mobile App offers a variety of print settings to help you achieve the desired output. Here are some of the key settings you can customize:
- Printer Selection: Choose from a list of available printers connected to your network.
- Number of Copies: Specify how many copies of the document you want to print.
- Page Range: Select the specific pages you want to print, or choose to print the entire document.
- Orientation: Choose between portrait and landscape orientation for your printed document.
- Color/Grayscale: Select whether you want to print the document in color or grayscale.
Printing from OneDrive
One of the advantages of using the O365 Mobile App for printing is the ability to access and print documents stored in your OneDrive account. Here’s how to print a Word file from OneDrive:
- Open the O365 Mobile App and sign in with your Microsoft account.
- Tap on the “OneDrive” icon to access your OneDrive files.
- Navigate to the Word file you want to print.
- Tap on the file to open it.
- Follow the same steps outlined in the previous section to print the document.
Printing from Other Cloud Services
In addition to OneDrive, the O365 Mobile App supports printing from other cloud services, such as Dropbox, Google Drive, and Box. Here’s how to print a Word file from these services:
- Open the O365 Mobile App and sign in with your Microsoft account.
- Tap on the “Files” icon to access the app’s file manager.
- Choose the cloud service you want to use (e.g., Dropbox, Google Drive, or Box).
- Navigate to the Word file you want to print.


