
Move Unity Files from Windows to Mac: A Comprehensive Guide
Transitioning from a Windows to a Mac environment can be a daunting task, especially if you’re a Unity developer. Unity, being a cross-platform game development engine, allows you to create games for various platforms, including Windows and Mac. However, moving your Unity files from Windows to Mac requires careful planning and execution. In this guide, I’ll walk you through the process step by step, ensuring a smooth transition.
Understanding the Differences

Before diving into the technicalities, it’s essential to understand the differences between Windows and Mac environments. While both are capable of running Unity, there are subtle differences in the way they handle files and permissions. Here’s a quick rundown:
| Aspect | Windows | Mac |
|---|---|---|
| File System | NTFS | HFS+ (APFS on newer models) |
| Permissions | NTFS permissions | File ownership and permissions |
| Text Editor | Notepad | TextEdit |
These differences can affect how you access and modify your Unity files on a Mac. Now, let’s move on to the actual process.
Preparation

Before you start moving your Unity files, ensure you have the following:
- Unity Hub installed on your Windows machine.
- Unity installed on your Mac.
- A backup of your Unity project files.
- Admin privileges on your Mac.
Creating a backup is crucial, as you don’t want to lose any of your hard work during the transition. You can use Unity Hub to create a backup of your project by selecting “Backup” from the context menu.
Transferring Files
There are several ways to transfer your Unity files from Windows to Mac. Here are the most common methods:
- External Hard Drive: Connect an external hard drive to your Windows machine, copy your Unity project files to it, and then connect it to your Mac. Copy the files from the external drive to your Mac’s hard drive.
- Cloud Storage: Use cloud storage services like Google Drive, Dropbox, or OneDrive to upload your Unity project files. Access the files on your Mac and download them to your local machine.
- Network Transfer: If you have a network connection between your Windows and Mac machines, you can use tools like FileZilla or Cyberduck to transfer the files.
Choose the method that works best for you, ensuring that your files are transferred securely and efficiently.
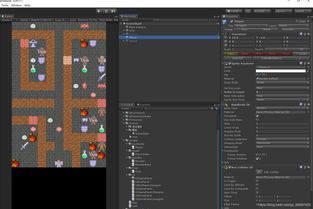
Setting Up Unity on Mac
Once your Unity files are on your Mac, you need to set up Unity to work with your project. Follow these steps:
- Open Unity Hub on your Mac.
- Select “Import Project” from the menu.
- Browse to the location of your Unity project files and select the “Assets” folder.
- Unity will automatically detect the project and import it.
During the import process, Unity may prompt you to install additional packages or resolve dependencies. Make sure to follow the instructions carefully to avoid any issues.
Testing Your Project
After setting up your Unity project on your Mac, it’s essential to test it to ensure everything works as expected. Here’s what you need to do:
- Open your Unity project in Unity Hub.
- Select “Build and Run” from the menu.
- Choose “MacOS” as the platform.
- Unity will build your project for the Mac platform and run it on your machine.
Test your project thoroughly, checking for any bugs or issues. If you encounter any problems, refer to Unity’s documentation or seek help from the community.
Finalizing the Transition
Once you’ve tested your project and are satisfied with its performance


